When you tackle a cedar fence installation yourself, having the right tools makes all the difference between frustration and satisfaction. You'll discover that certain equipment turns tedious tasks into manageable ones, saving both time and backaches. While many homeowners rush to purchase pre-made fence kits, they often overlook the fundamental tools that truly determine project success. Let's explore the three must-have tools that experienced builders consider non-negotiable for any DIY cedar fence project.
Zippity Outdoor Products Newberry Wood Fence Kit (32" x 48", 2 Panels)
The Zippity Newberry Wood Fence Kit offers an ideal solution for homeowners seeking quick, temporary fencing without the hassle of digging or concrete work. Made from FSC certified wood with smooth finishes, this kit includes two 32" × 48" panels perfect for garden borders or containing small dogs.
You'll appreciate the straightforward installation—simply pound the stake brackets into your desired location. While most users complete assembly within an hour using just a drill, hammer, and level, be prepared for potential challenges with screw quality. The 2 1/3" picket spacing balances aesthetic appeal with practical functionality, though don't expect complete privacy from these decorative panels.
Best For: Homeowners seeking an attractive, temporary fencing solution for garden borders or containing small dogs without permanent installation or extensive digging.
Pros:
- Quick and simple installation with stake brackets that require no digging or concrete mixing
- Made from high-quality FSC certified wood with smooth finishes on all surfaces
- Versatile design allows for flexible placement in various outdoor spaces including gardens, patios, and yards
Cons:
- Screw heads tend to strip easily during assembly, potentially complicating the installation process
- Not designed for privacy as the picket spacing creates a decorative rather than screening effect
- Some customers report difficulties with customer support when replacement parts are needed or returns are required
Greenes Fence Cedar Wood Garden Picket Fence 16 H x 8 L (6-Pack, 48 Total)
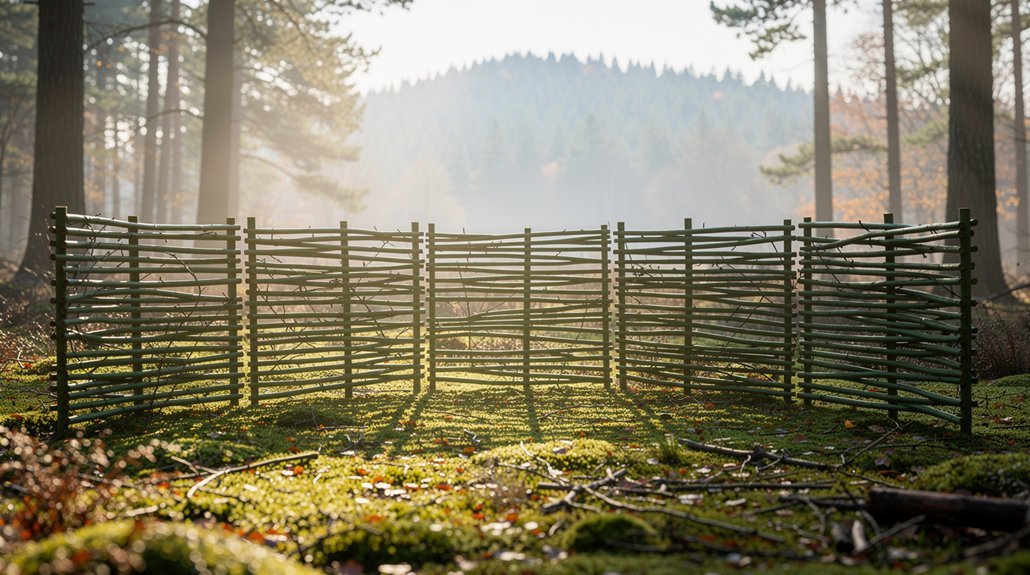
Homeowners seeking flexible and eco-friendly garden borders will appreciate Greenes Fence Cedar Wood Garden Picket Fence's versatile design. This 6-pack provides 48 total feet of sustainably sourced cedar fencing that you can arrange in straight or curved configurations.
You'll find multiple applications for this 16-inch-high picket fence—from protecting growing plants to creating pet boundaries in your yard. Many customers praise its portability and ease of installation, though you'll need to purchase stakes separately.
Be aware of potential quality issues, as some buyers report receiving damaged products with broken slats or cracked pieces. Consider inspecting thoroughly upon delivery.
Best For: Homeowners with gardens who need decorative, flexible barriers to protect plants or create pet boundaries while maintaining a natural aesthetic.
Pros:
- Made from sustainably sourced cedar wood that adds natural beauty to garden landscapes
- Flexible design allows installation in both straight lines and curves to accommodate various garden layouts
- Portable and relatively easy to install without requiring permanent fixture
Cons:
- Requires separate purchase of stakes for proper installation
- Quality control issues with some packages arriving damaged (broken slats or cracked pieces)
- May not be sturdy enough for containing larger pets or withstanding harsh weather conditions
Zippity Outdoor Products Portable Vinyl Puppy Fence Kit (2 Panels)
Looking for a versatile, easy-to-relocate fencing solution for small pets or holiday decorations? The Zippity Portable Vinyl Puppy Fence Kit offers cedar-colored WoodTek Vinyl panels that provide wood aesthetics without maintenance headaches.
Each 22⅜" × 44" panel assembles in about 45 minutes. You'll appreciate its functionality both indoors (with included no-scratch pads) and outdoors around pools, campsites, or yards. While perfect for protecting Christmas trees or containing small pets, be aware of stability concerns in windy conditions. Some components require significant force during assembly.
The lightweight design allows easy repositioning, though larger pets may overpower it.
Best For: Pet owners seeking a portable, lightweight containment solution for small dogs or puppies who need to protect indoor decorations or create temporary outdoor boundaries.
Pros:
- Attractive cedar-colored WoodTek Vinyl offers the aesthetic appeal of wood without maintenance requirements
- Versatile design works for both indoor use (with no-scratch pads) and outdoor applications
- Easy to reposition and transport for temporary containment needs
Cons:
- Lacks stability in windy conditions, making it prone to tipping over outdoors
- Assembly requires significant force for some components, extending the 45-minute setup time
- Not suitable for larger or more active dogs who could easily knock it over or jump over the 22⅜" height
Factors to Consider When Choosing the Most Essential Cedar Fence Installation Toolkit for DIY Projects
When building your cedar fence, you'll need to evaluate which tools are truly essential based on your project's specific requirements and your woodworking experience. You should consider the quality of materials in your toolkit, ensuring durability while balancing your budget constraints for an investment that won't break the bank. The most practical cedar fence toolkits offer versatility, allowing you to use the same tools for future home improvement projects beyond just fence installation.
Subheading Discussion Points for Factors to Consider When Choosing Most Essential Cedar Fence Installation Toolkit for DIY Projects
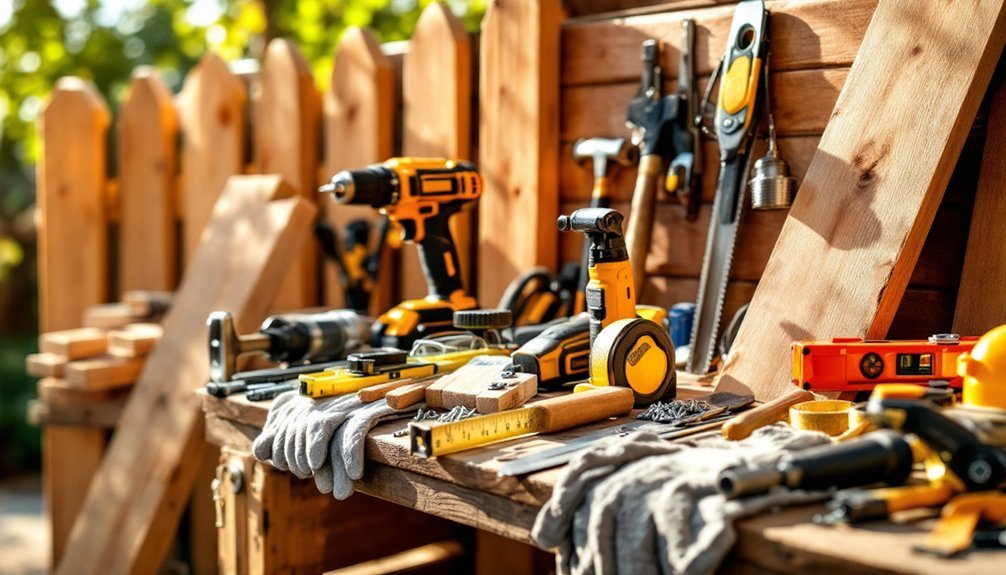
Initiating a cedar fence installation project requires careful consideration of the tools you'll need to secure a successful outcome. A power drill with Phillips bits should top your list, as it's vital for efficiently securing panels and screws throughout the installation process.
Don't overlook basic tools like a hammer or mallet for driving stakes into the ground, especially for no-dig fence systems. A level is equally important to guarantee panels align properly, enhancing both appearance and structural integrity.
Clear instructions are essential companions to your toolkit, preventing common mistakes during assembly. For maximum flexibility, include a measuring tape and saw to customize panel lengths according to your specific layout requirements. These additional tools will help you adapt to unexpected challenges during your DIY fence project.
Required Tool Types
Assembling your cedar fence installation toolkit requires prioritizing essential tools that balance functionality and practicality. Start with a power drill equipped with Phillips bits to efficiently drive screws into fence panels and secure them properly.
You'll need a hammer or mallet for pounding stakes into the ground, providing stability without mixing concrete. A level is non-negotiable for guaranteeing panels maintain even alignment and professional appearance.
Don't overlook a tape measure for accurate spacing and proper panel alignment—this simple tool prevents costly mistakes and guarantees aesthetic consistency throughout your installation.
Always wear safety goggles during the project to protect your eyes from flying debris or accidents while using power tools. These five core tools form the foundation of an effective cedar fence installation toolkit for any DIY project.
Material Quality Assessment
Material quality assessment represents a critical step before purchasing your cedar fence installation toolkit. You'll want to focus on sustainably sourced cedar, which offers both environmental benefits and superior durability. Inspect each board carefully, avoiding pieces with cracks, splits, or large knots that could compromise your fence's structural integrity.
Select thicker cedar boards for maximum durability, as they better withstand weather extremes and physical impacts. Confirm your chosen wood is either naturally resistant to decay and insects or has been properly treated. The finish quality matters too—look for smooth surfaces and edges to prevent splintering and potential injuries. Remember that investing time in quality assessment now will save you from premature repairs and replacements, ultimately maximizing your cedar fence's lifespan and appearance.
Budget Constraints
While quality assessment focuses on the materials themselves, your budget planning will determine which tools make it into your cedar fence installation toolkit. When calculating expenses, account for all essential items: tools, fasteners, and installation equipment. Basic tool costs typically range from $50-$200, depending on your project's scope.
Consider the value proposition of higher-quality tools. Though more expensive upfront, premium options often improve efficiency and reduce replacement needs over time. This long-term perspective can save you money throughout your fence-building project and beyond.
Always build in a 10-15% buffer for unexpected costs. You might need replacement parts or additional tools midway through installation. This financial cushion provides flexibility when surprises arise, preventing your DIY fence project from stalling due to budget shortfalls.
Tool Versatility
The right combination of versatile tools can dramatically simplify your cedar fence installation while adapting to unexpected challenges along the way. A power drill with Phillips bits should top your list, efficiently securing panels and hardware with minimal effort. Don't overlook a quality hammer or mallet for driving stakes without damaging your cedar materials.
A reliable level guarantees your fence maintains aesthetic appeal and structural integrity by confirming each panel sits perfectly straight. Include adjustable wrenches for tightening hardware across different panel designs, giving you flexibility when specifications vary. Finally, round out your toolkit with hand tools like pliers and saws for on-the-spot customization when your garden's unique shape demands modifications. This balanced approach to tool selection prepares you for both standard installations and unexpected adjustments.
Project Scale Impact
Selecting the right toolkit for your cedar fence installation depends primarily on the scope and complexity of your project. Smaller DIY fence projects may only require basic tools like a hammer, level, and power drill, while larger installations demand more extensive equipment to handle heavier materials and longer fence panels.
Consider your terrain carefully—rocky or uneven ground calls for specialized digging tools and sturdier stakes. Don't overlook quality fasteners and connectors, which become increasingly important as your project size increases and materials face greater stress loads.
For extensive projects, you'll also need to invest in appropriate safety gear like gloves and protective eyewear, especially when operating power tools or managing heavy cedar panels over extended work periods. Your project's scale ultimately determines both the range and durability of tools required.
Weather Resistance Features
Beyond project scale considerations, weather resistance becomes a key factor when assembling your cedar fence installation toolkit. While cedar's natural properties already provide excellent protection against decay and insects due to its high tannin content, you'll need specific tools to maximize these benefits.
Include applicators for sealants and stains that enhance cedar's natural oils, which repel moisture and prevent warping. You'll want quality brushes or sprayers that guarantee even coverage across all fence surfaces. Consider adding drainage tools like post hole diggers that create proper water runoff paths.
For areas with extreme weather conditions, include specialized fasteners that won't corrode or loosen during temperature fluctuations. Don't forget ventilation-promoting tools that help prevent mold growth by allowing air circulation between boards and around posts.
Frequently Asked Questions
How Long Does Cedar Fence Installation Typically Take for Beginners?
You'll typically spend 2-3 days installing a cedar fence as a beginner. The timeline depends on your property size, preparation work, and whether you're working alone or have help.
Can I Install a Cedar Fence on Uneven or Sloped Terrain?
Yes, you can install a cedar fence on uneven terrain. You'll need to step or contour the panels to follow the slope, or grade the panels by cutting their bottoms to maintain level tops.
What Maintenance Is Required for Cedar Fences in Humid Climates?
In humid climates, you'll need to clean your cedar fence annually with mild soap, apply water-repellent sealant every 2-3 years, inspect for mold growth regularly, and guarantee proper drainage around posts to prevent premature rot.
Are Power Tools Necessary or Can I Use Manual Tools Only?
You don't need power tools for cedar fence installation, but they'll save you time and effort. Manual tools work fine if you're patient—hand saws, hammers, and manual post hole diggers can get the job done effectively.
How Deep Should Fence Posts Be Buried for Optimal Stability?
You'll want to bury your fence posts at least 1/3 of their total length. For a 6-foot fence, that's 2-3 feet deep. Deeper is better in areas with loose soil or high winds.

Leave a Reply