Lancashire hedge laying requires precision and technique. You’ll need specialized tools like Yorkshire billhooks and beadles, plus flexible hazel rods for binding. Start by selecting healthy hedgerows and clearing your workspace. Make angled cuts 3-10cm above ground level, then weave pleachers through stakes positioned 50cm apart. Secure with hazel bindings in the distinctive Lancashire pattern. Maintain your hedge during dormant seasons (October-March) for longevity. The following guide reveals all secrets to creating this robust, wildlife-friendly barrier.
Origins and Characteristics of the Lancashire Hedge Laying Style

While many regional hedge laying styles exist across Britain, Lancashire’s distinctive approach stands out for its robust construction and practical design. Developed to meet the specific agricultural demands of the region, this technique creates exceptionally stock-proof barriers that withstand harsh northern conditions.
You’ll notice the Lancashire style uses thick, horizontal pleachers in place, laid at steeper angles than other regional methods. This positioning encourages vigorous regrowth while creating an impenetrable barrier for livestock.
The unique binding method combines hazel and willow, adding both strength and flexibility to the finished hedge.
This technique represents more than practical farming—it’s a cultural heritage, traditionally practiced by skilled local craftsmen who passed their knowledge through generations, shaping Lancashire’s distinctive landscape while providing valuable wildlife habitat.
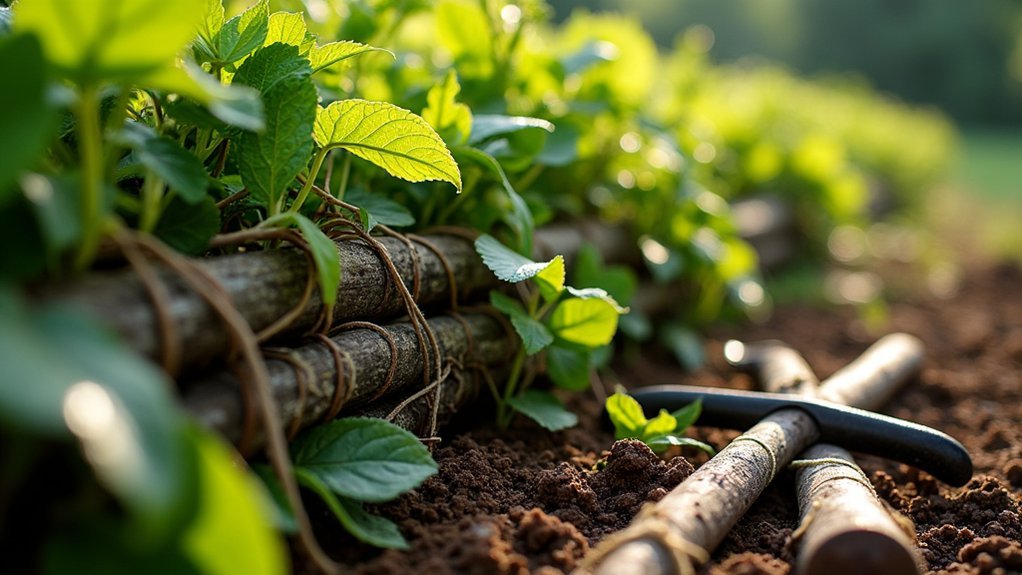
Essential Tools and Materials for Lancashire Hedge Laying
Mastering the Lancashire hedge laying craft requires the right implements in your hands.
The artisan’s success in Lancashire hedgerow creation begins with selecting proper traditional tools for the craft.
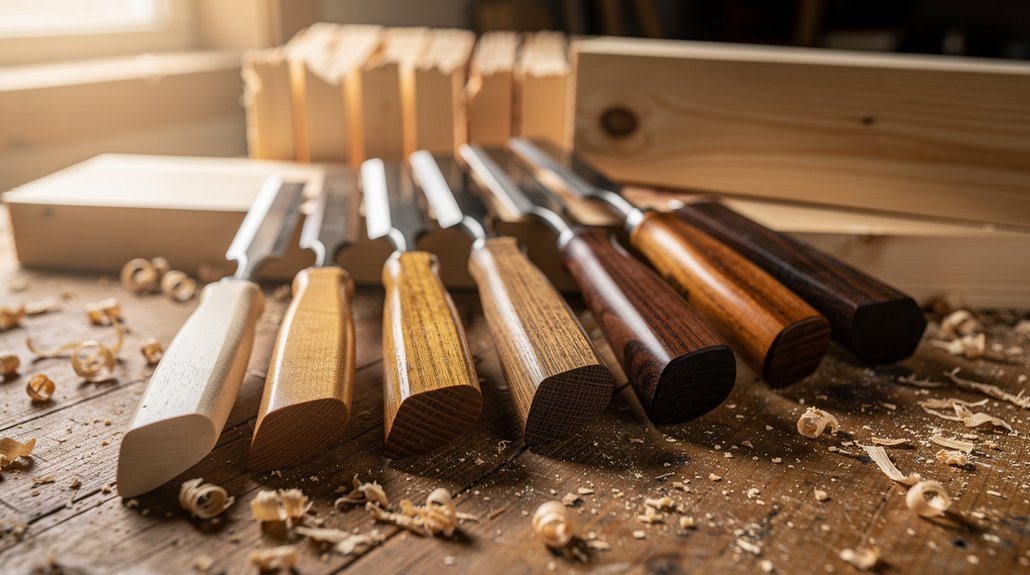
You’ll need a combination of traditional cutting, shaping, and binding tools to create a sturdy, living fence. Many practitioners prefer vintage tools for their superior craftsmanship and performance compared to modern alternatives.
- Yorkshire billhook – essential for cutting and shaping pleachers with precision
- Hand saw – necessary for tackling larger stems that your billhook can’t handle
- Beadle – used for driving stakes (4cm diameter) approximately 50cm into the ground
- Flexible hazel rods – 3m long and 25mm thick for binding pleachers between stakes
- French loppers – trim side branches efficiently when preparing pleachers before laying
With these tools properly maintained, you’ll be equipped to practice this traditional craft effectively and authentically.
Preparing Your Site and Selecting Suitable Hedgerows
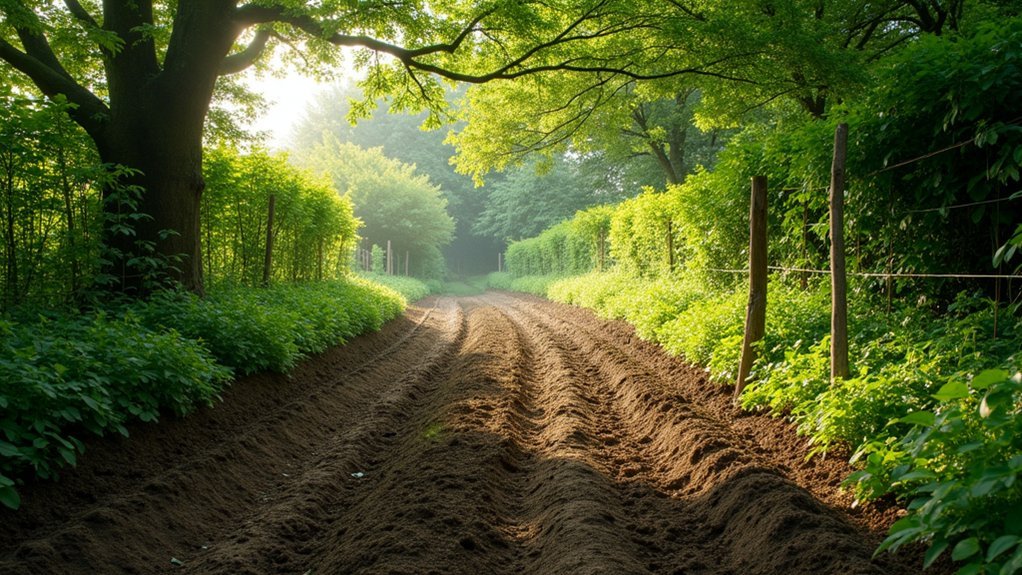
Before attempting Lancashire hedge laying, you’ll need to clear your workspace of debris and conduct a thorough risk assessment to identify hazards like hidden wire fencing.
Select healthy, young pleachers while avoiding invasive species such as elder, as these provide the best foundation for a traditional laid hedge.
Trim away dead wood and out-of-line growth to create a clean layout, ensuring you’ve got adequate space for the hedge to develop properly over time.
Suitable Hedge Selection
The foundation of successful Lancashire hedge laying begins with selecting appropriate native species and preparing your site properly.
Your suitable hedge selection should prioritize species that thrive in Lancashire’s climate while supporting local wildlife. Assess your site’s soil type, drainage, and sun exposure before making final decisions.
- Choose native species like hawthorn, blackthorn, and hazel—these provide excellent habitat and food sources for local fauna.
- Mix multiple species for year-round interest, enhanced biodiversity, and visual appeal.
- Consider mature height and spread to guarantee your hedge fits the available space.
- Select species that match your soil conditions—some prefer well-drained soil while others tolerate clay.
- Include flowering varieties to support pollinators and berry-producing species to feed birds through winter.
Workspace Clearing Essentials
Proper workspace clearing forms the backbone of successful Lancashire hedge laying, ensuring both safety and ideal conditions for your project.
Begin by thoroughly removing all broken glass, rubbish, and dead wood from the base of your hedge to create a secure working environment.
Conduct a thorough risk assessment before starting work, identifying potential hazards like hidden wire fencing or unstable branches.
Make sure everyone in your hedgelaying group understands these risks.
When evaluating your hedgerow, look for healthy, young pleachers that will bend without breaking.
Remove any dead wood and out-of-line growth that could compromise the structure.
Prioritize hedges with diverse native species—they’ll provide better stability and create valuable wildlife habitats once properly laid.
Initial Risk Assessment
Now that your workspace is clear, conducting a thorough risk assessment becomes your next priority for Lancashire hedge laying success.
Before any stems are cut and laid, evaluate your hedgerow’s health, structure, and surrounding environment to guarantee ideal results and safety for everyone involved.
- Check soil conditions to determine if they’ll support newly laid pleachers
- Assess the hedge density and identify young stems with good growth potential
- Document hazardous elements like old wire fencing that may damage tools
- Look for invasive species that could compromise your hedgerow’s integrity
- Evaluate the site’s overall suitability for the Lancashire style of laying
Engage your team in this assessment process—their observations may catch potential issues you’ve missed and their understanding of risks will contribute greatly to your project’s success.
The Pleaching Technique: Making the Perfect Cut
Select your tools carefully, ensuring you’re equipped with sharp billhooks, axes, or saws that’ll create clean pleacher cuts.
You’ll need to master the angled cut technique, slicing the stem at 30-45 degrees about 3-10cm above ground level to maintain the essential living connection.
The depth of your pleach directly affects the hedge’s future growth and stability, so you must cut just deep enough to allow bending without severing the core cambium layer.
Proper Tool Selection
The art of pleaching begins with choosing the right tools for your Lancashire hedge laying project.
You’ll need specialized equipment that allows for precise cutting back of stems while ensuring the hedge’s future vitality. The billhook stands as your primary tool, featuring a curved blade designed specifically for creating clean angled cuts 3-10 cm above ground level.
- Billhook – Essential for cutting through stems and shaping pleachers with precision
- Pruning shears – For trimming smaller branches and cleaning up
- Mallet – To drive stakes firmly into the ground
- Hazel binding rods – Flexible yet strong material for securing pleachers to stakes
- Protective gloves – Heavy-duty to prevent injuries when cutting back thorny species
Select quality tools that feel comfortable in your hands, as proper equipment makes all the difference in creating a durable Lancashire hedge.
Angled Cut Technique
Mastering the angled cut forms the cornerstone of successful Lancashire hedge laying. To execute this technique effectively, position your sharp billhook or pruning saw to trim the pleacher at a precise 45-degree angle above ground level. This clean cut encourages smooth laying and promotes robust regeneration.
Make your cuts between 3-10cm above the ground—this ideal height prevents tangling while facilitating proper laying. As you position each pleacher, maintain an upward slant to guarantee new foliage sprouts effectively, contributing to a thick, healthy hedge.
Throughout the process, regularly check your pleachers for proper alignment. Correct positioning is vital for binding with stakes later, which enhances the hedge’s structural integrity.
Pleach Depth Matters
Achieving proper pleach depth represents the difference between a thriving hedge and a failing one. When making your pleach cut, aim for 3-10 cm above ground level, cutting at an angle that facilitates a smooth bend without breaking the stem. Remember that pleach depth matters for both structural integrity and future growth.
- Make cuts on the side facing away from the main hedge to prevent tangling.
- Use sharp tools for clean cuts that promote faster healing and regeneration.
- Cut deep enough to allow flexible bending while maintaining the stem’s strength.
- Guarantee your pleach supports the branch weight while encouraging new shoots.
- Position the stem securely after cutting to maintain the hedge’s intended shape.
The proper depth guarantees your Lancashire hedge will develop the dense, living structure that makes this traditional technique so valuable for wildlife and boundaries alike.
Securing Your Hedge: Stakes and Bindings in the Lancashire Method

Proper staking and binding form the backbone of a successful Lancashire hedge, transforming loose pleachers into a sturdy, living fence.
You’ll need durable hardwood stakes, typically ash or oak, driven into the ground at 50cm intervals to support your laid stems.
After cutting your pleachers 3-10cm above ground level and laying them at an upward angle, weave them through the stakes to create the hedge structure.
The artful positioning of freshly cut pleachers between stakes forms the living architecture of your Lancashire hedge.
Next, use flexible hazel rods for binding, carefully weaving them around both stakes and pleachers to secure everything together.
Don’t forget to trim the tops of your stakes after binding is complete. This creates a uniform appearance and prevents interference with pleacher growth.
Organize your team efficiently—some laying the hedge while others clear trimmings—to maintain a productive workspace.
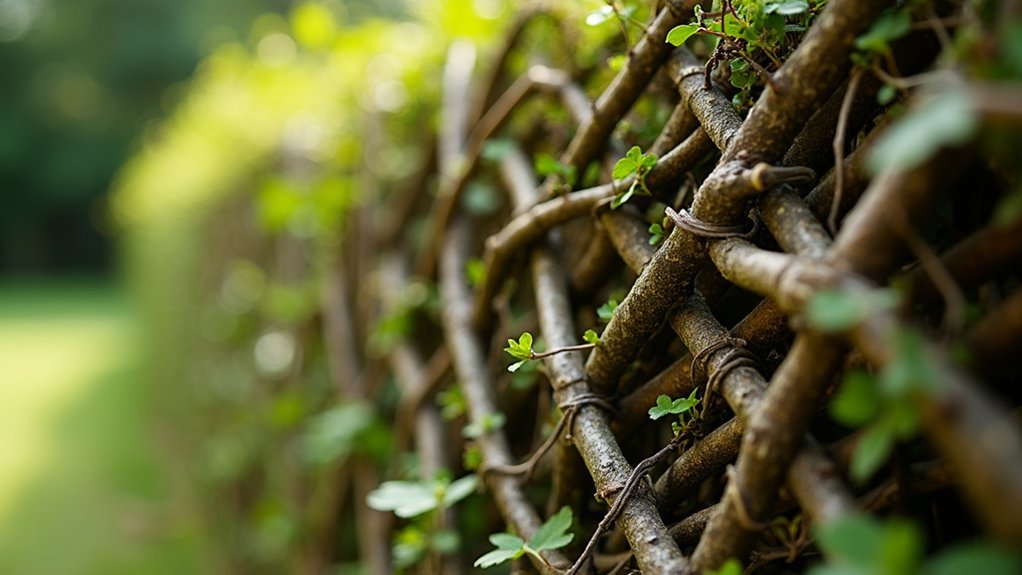
Creating the Distinctive Lancashire Weave Pattern
Three key elements define the authentic Lancashire weave pattern: angled pleachers, strategic stake placement, and tight binding.
When you lay your pleachers at approximately 10-15cm above ground level, you’ll create the foundation for the characteristic interlocked structure that makes Lancashire hedges so resilient.
Position your stakes about 50cm apart to support the weave properly. As you work, thread the pleachers through these upright stakes at an angle, creating that distinctive alternating pattern that’s both functional and attractive.
- Cut pleachers low enough (10-15cm) to encourage strong regrowth
- Weave tops of pleachers through upright stakes at consistent angles
- Use flexible hazel binders to secure the structure
- Guarantee stakes are evenly spaced at approximately 50cm intervals
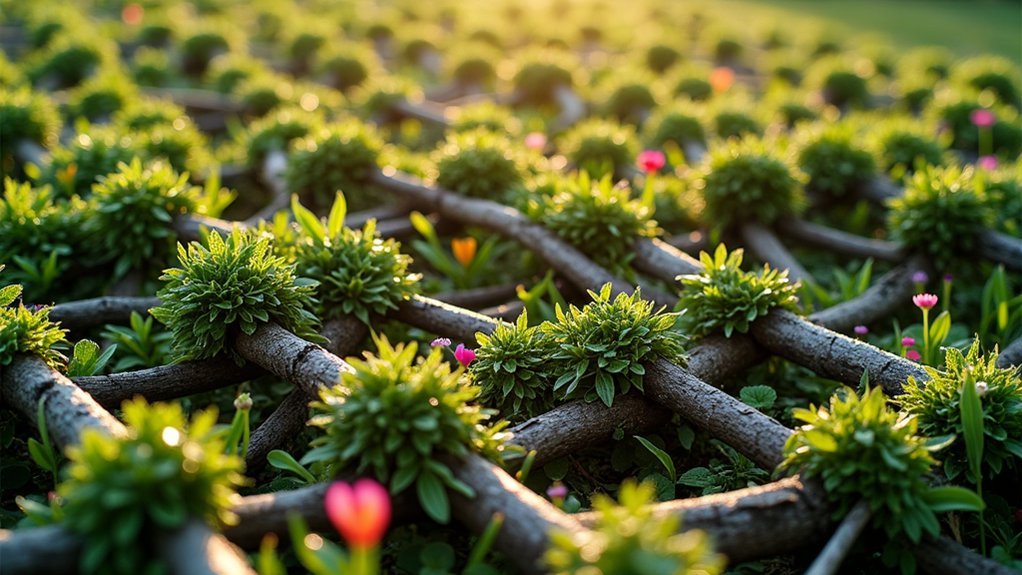
- Create alternating patterns that form dense wildlife habitats while containing livestock
Finishing Touches and Aesthetic Considerations
A well-crafted Lancashire hedge reveals its true character through careful finishing work. After binding your pleachers, trim the tops of the stakes to create a uniform appearance that enhances the hedge’s overall aesthetic.
The artistry of a Lancashire hedge emerges in its final details—neatly trimmed stakes create the signature refined silhouette.
You’ll want to maintain a gentle, flowing line that follows the natural shape of your hedge, adding visual interest to your landscape.
For a traditional Lancashire look, use natural materials like hazel or willow for binding, preserving the rustic charm.
Don’t overlook the hedge base—incorporate native plants to improve biodiversity and add seasonal color and texture.
Remember that regular maintenance is crucial. Schedule periodic trimming and remove invasive species to keep your hedge healthy and visually appealing.
These finishing touches will guarantee your Lancashire hedge remains both functional and beautiful.
Seasonal Maintenance of Lancashire Hedges
While your masterfully crafted Lancashire hedge creates a living boundary, it requires consistent seasonal attention to thrive. Schedule your seasonal maintenance of Lancashire hedges during the dormant period from October to March for best results.
- Trim regularly to maintain your hedge’s desired height and shape, encouraging dense, healthy growth.
- Remove dead wood and out-of-line growth to promote new pleachers and strengthen the hedge structure.
- Bind with traditional hazel rods to secure pleachers and support regeneration.
- Conduct periodic inspections to identify and remove invasive species before they compromise hedge integrity.
- Assess overall condition during winter months when the hedge’s structure is most visible, addressing any weaknesses before spring growth begins.
Your diligent maintenance guarantees your Lancashire hedge will serve as a beautiful, functional boundary for decades to come.
Common Challenges and Troubleshooting Tips
Even experienced hedge layers encounter obstacles when crafting the perfect Lancashire hedge, but knowing how to address these issues guarantees your living boundary thrives.
When faced with thick or dead wood, remove these sections entirely—they’ll only frustrate your progress. Always select young, pliable stems for pleachers that’ll bend without breaking.
If you’re struggling with inconsistent angles, remember that poorly positioned pleachers compromise both stability and regrowth potential.
Before beginning your work, trim excessive growth to prevent pleachers from tangling between stakes. You’ll find laying and binding much smoother afterward.
Throughout the process, check your binders’ tension regularly—loose bindings lead to unstable structures.
If your finished hedge appears uneven, make quick adjustments by trimming stake tops and securing any loose pleachers for a balanced, professional result.
Frequently Asked Questions
How to Lay a Hedge for Beginners Step by Step?
You’ll want to remove lower branches, cut stems at an angle, lay pleachers upward, drive stakes 50cm apart, and bind with flexible rods. This creates a living fence that’ll regenerate and strengthen over time.
Can You Lay a Hawthorn Hedge?
Yes, you can definitely lay a hawthorn hedge. It’s actually an excellent choice due to its flexible stems that regenerate well when laid. You’ll want to work during the dormant season (October-March) for best results.
What Time of Year for Hedge Laying?
You’ll want to lay hedges between October and March during plants’ dormant season. This timing minimizes stress, avoids nesting periods, provides softer ground for working, and allows you to gather necessary supporting materials.
What Is Lancashire Style Hedge Laying?
Lancashire style hedge laying is a technique where you’ll cut stems partially, lay them at an angle, and weave them together. You’ll use hazel binders to secure the structure, creating a dense, livestock-proof boundary typical to Northwest England.
In Summary
You’ve now mastered the essentials of Lancashire hedge laying. With practice, you’ll develop your own rhythm and style while preserving this traditional craft. Remember to maintain your hedge regularly and don’t hesitate to adapt techniques to suit your specific conditions. By keeping this rural tradition alive, you’re not just creating a beautiful boundary—you’re connecting with centuries of countryside heritage.

Leave a Reply