Installing terraced multi-level living fences requires careful planning and preparation. First, assess your terrain’s slope and test soil composition for proper drainage. Mark your boundaries with stakes and string before constructing any necessary retaining walls. Select climate-appropriate plants with complementary growth patterns, considering both native and exotic varieties. Install efficient drip irrigation systems and develop a seasonal maintenance schedule for pruning and fertilizing. These foundational steps will transform your sloped landscape into a thriving, functional living barrier.
Installing Terraced Multi-Level Living Fences: Step-by-Step Guide
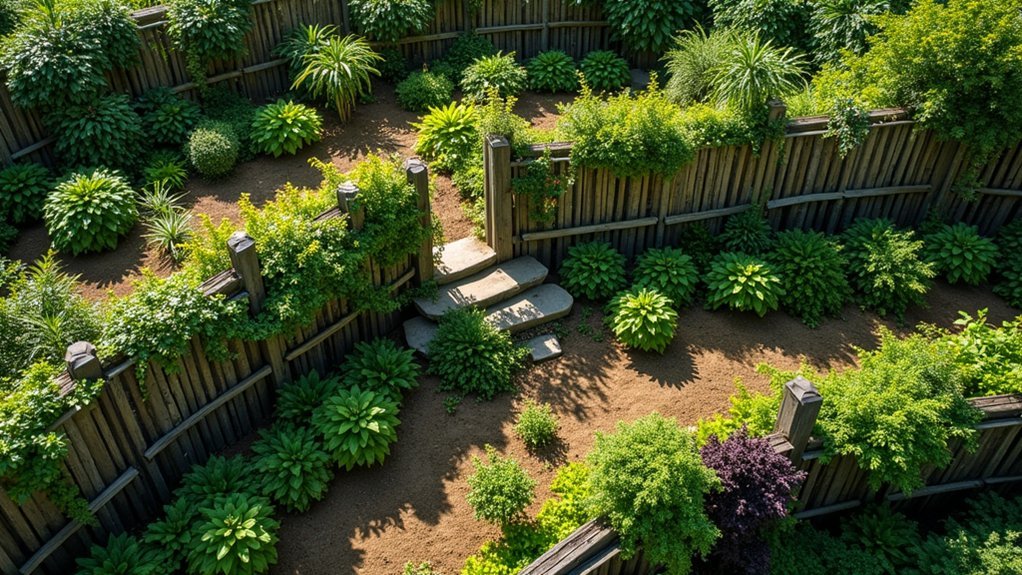
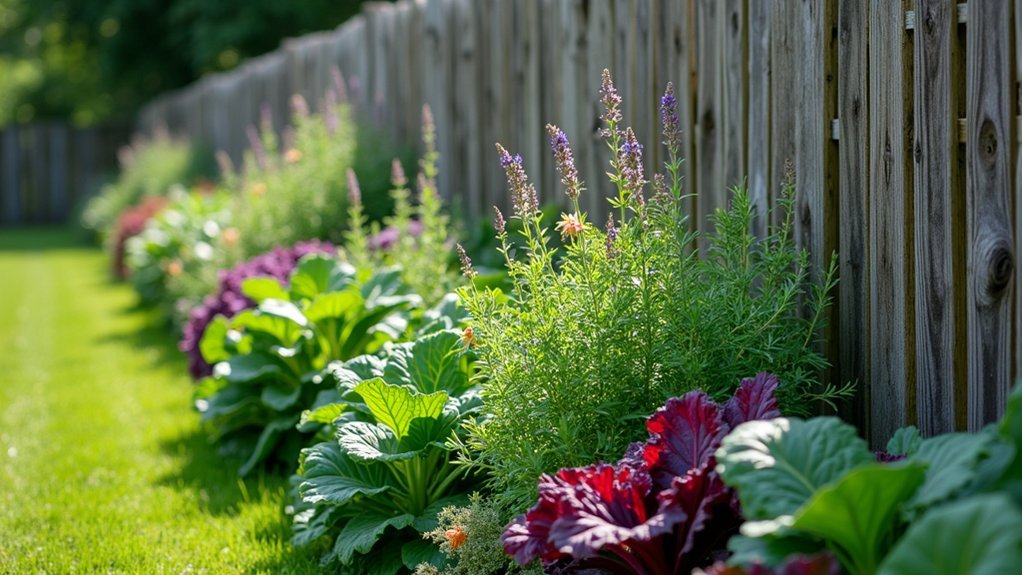
While traditional fences merely create boundaries, terraced multi-level living fences transform your landscape into a dynamic ecosystem that’s both functional and beautiful.
Begin by planning your layout based on your slope and soil conditions, ensuring each tier has adequate space for plant growth and maintenance access.
Thoughtful design begins with understanding your terrain’s natural contours—the foundation for a successful terraced living fence.
Prepare the area by clearing debris and enriching the soil with organic matter.
Next, construct sturdy retaining walls using natural materials like stone or timber that can support soil weight while allowing proper drainage between levels.
Select plants strategically—place drought-resistant varieties on upper terraces and moisture-loving plants on lower levels.
Consider each plant’s sunlight requirements and mature size when positioning them.
Don’t neglect maintenance; regular watering, composting, and inspection for erosion issues will keep your living fence thriving for years to come.
Understanding the Benefits of Terraced Living Fences
Now that you’ve learned how to install these dynamic landscape elements, let’s explore why they’re worth your effort. Terraced living fences offer multiple advantages beyond standard fencing options for your terraced garden.
| Benefit | Description |
|---|---|
| Enhanced Privacy | Multi-level design creates natural screening with varied heights and textures |
| Erosion Control | Reduces soil runoff on slopes while improving water retention |
| Biodiversity | Creates microclimates supporting diverse plant species and wildlife |
| Space Optimization | Maximizes limited areas while improving maintenance accessibility |
| Value Addition | Increases property appeal through both functional and aesthetic elements |
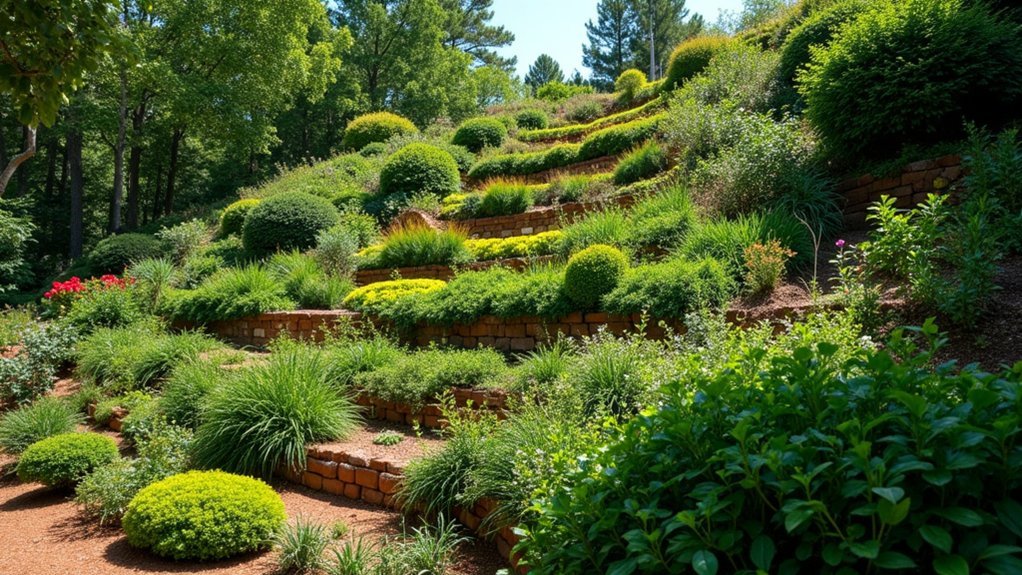
You’ll notice these living structures not only serve practical purposes but also transform your outdoor space into a visually striking landscape. The terraced design works harmoniously with natural contours, creating distinct garden rooms while functioning as effective property boundaries.
Planning Your Multi-Level Fence Layout
When planning your multi-level fence layout, you’ll need to carefully assess terrain gradients to determine how many tiers will work best with your property’s natural slope.
Mark your fence boundaries using stakes and string to visualize the complete structure before breaking ground, ensuring proper alignment with existing landscape features.
Don’t forget to take into account exposure factors like sun, wind, and precipitation patterns, as these will impact both plant selection and the structural requirements of your living fence system.
Assess Terrain Gradients
Before breaking ground on your multi-level living fence, you’ll need to thoroughly evaluate your property’s natural contours and slopes. Using a level tool, measure the gradient angles to determine how steep your sloping garden actually is—this data will inform your entire fence design.
Take height measurements at various points along the planned fence line, recording the differences to plan each tier’s height accurately. Mark your intended layout with stakes and string, creating a visual guide that follows the land’s natural shape.
Don’t overlook drainage patterns—proper water runoff is essential to prevent erosion that could undermine your fence’s stability.
The assessment phase helps you design fence levels that complement your landscape while ensuring each section remains accessible and functional within your garden space.
Mark Fence Boundaries
Four essential steps mark the beginning of your multi-level fence layout process. Start by taking precise measurements of your property’s perimeter, accounting for terrain slopes to guarantee your living fence integrates naturally with the landscape.
Next, drive stakes at key boundary points and connect them with string to visually outline your fence’s footprint, helping you spot potential obstacles before installation begins.
Using spray paint or garden lime, mark the ground to indicate the height and width variations for each level of your fence. These markings serve as vital guidelines for plant spacing and growth allowances.
Position your fence to maximize sunlight exposure for ideal plant health, enhancing your outdoor living space. Remember to check local regulations regarding fence height limitations before finalizing your design.
Consider Exposure Factors
Successful multi-level living fences depend heavily on understanding your property’s unique exposure conditions.
Carefully assess sunlight patterns, wind direction, and proximity to structures before finalizing your design. These exposure factors will determine which plants thrive at each level and how to structure your fence for maximum stability and visual appeal.
- Sun exposure – Map the daily sunlight patterns across your intended fence line, selecting sun-loving plants for brighter areas and shade-tolerant varieties for sections receiving less light.
- Wind patterns – Choose wind-resistant species for exposed sections to prevent damage and guarantee long-term stability.
- Water drainage – Design your levels to manage runoff naturally, preventing soil erosion between tiers and waterlogging that could compromise both plants and structure.
Remember to take into account seasonal changes to maintain year-round visual interest in your terraced living fence.
Selecting the Right Plants for Your Living Fence
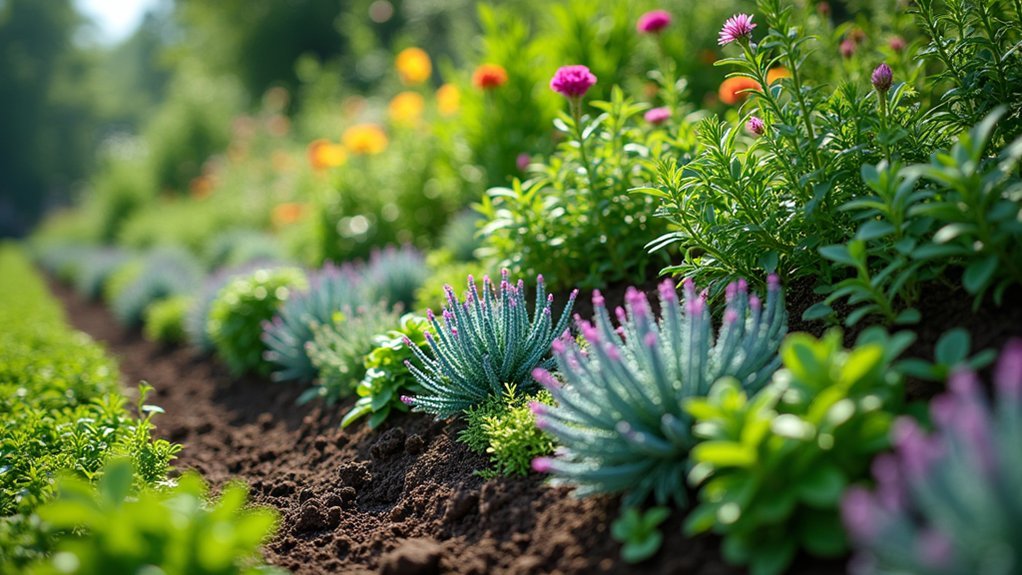
When creating your multi-level living fence, you’ll need to choose between native plants that support local ecosystems and exotic varieties that might offer unique aesthetic benefits.
Your selection should prioritize species that thrive in your specific climate zone, with particular attention to temperature extremes, rainfall patterns, and soil conditions.
Consider both immediate privacy needs and long-term growth patterns, as some fast-growing plants provide quick screening but may require more maintenance than slower-growing alternatives.
Native vs. Exotic Plants
Choosing between native and exotic plants represents one of the most significant decisions you’ll make when installing a living fence.
Native plants thrive in your local environment with minimal maintenance, as they’ve adapted to regional soil conditions and climate patterns over thousands of years. They’ll also support your local ecosystem by providing habitat and food for wildlife.
When selecting plants for your terraced living fence, consider these advantages of native options:
- Resilience – Native plants develop natural defenses against local pests and diseases.
- Stability – Their deep root systems prevent soil erosion, essential for terraced structures.
- Biodiversity – They attract pollinators and birds, creating a thriving garden ecosystem.
While exotic varieties might offer unique aesthetics, they often demand specific care and potentially introduce harmful invasive qualities to your landscape.
Climate-Appropriate Plant Selection
Beyond simply selecting native varieties, your living fence’s success depends largely on how well your chosen plants match your specific climate conditions.
When landscaping your terraced fence, consider whether evergreens or deciduous plants better suit your needs—evergreens provide year-round privacy and windbreaks, while deciduous species offer seasonal variation and winter sunlight.
Assess your soil type before planting; loamy soil supports diverse options, while sandy conditions call for drought-tolerant species.
Create visual interest by incorporating various heights and textures, using taller plants like hawthorn or privet as the structural backbone with lower-growing species filling gaps.
Remember to monitor growth patterns regularly after planting to prevent overcrowding.
Well-chosen, climate-appropriate plants will require less maintenance and show greater resilience against local pests and diseases, ensuring your living fence thrives for years.
Privacy and Growth Considerations
Privacy remains the primary motivation for many homeowners installing living fences, so your plant selection must prioritize this core function while accommodating growth patterns.
Evergreen species like junipers and boxwoods offer year-round privacy with their dense growth habits, making them excellent foundation plants for your living fence.
When planning your privacy barrier, consider:
- Growth rate – Fast-growing varieties like bamboo provide quick coverage but require vigilant maintenance to prevent spreading.
- Seasonal changes – Mix evergreens with flowering shrubs like hydrangeas for continuous privacy with added visual interest.
- Layering strategy – Position taller plants at the back and shorter varieties in front for thorough privacy and aesthetic appeal.
Your soil type will greatly impact plant performance—loamy soils support diverse options, while clay or sandy soils limit your selections.
Essential Tools and Materials for Construction

Before starting your multi-level living fence installation, you’ll need to gather the right tools and materials to guarantee a successful project.
Essential tools include a tape measure for accurate dimensions, a shovel, and a post hole digger for creating spaces for your fence posts. Don’t forget a level to verify even terraces and proper alignment, plus a hammer and drill for securing panels and hardware.
Quality tools make precise construction possible – measure twice, dig once, align perfectly.
For materials, you’ll need fence panels, posts, concrete mix for stability, and fasteners like screws and nails.
If you’re creating a true living fence, add soil and compost to your list, along with appropriate gardening supplies.
Finally, prioritize safety by equipping yourself with gloves, safety goggles, and protective boots to prevent injuries during construction.
Preparing the Ground and Marking Terrace Levels
Begin your multi-level living fence installation by testing soil composition and drainage capabilities, which will inform your choice of suitable living fence species.
Map the slope gradients across your property using a water level or laser level to identify natural contours that’ll guide your fence placement.
Install wooden stakes with colored flags at planned terrace intervals, ensuring each level marker provides clear visualization of your future living fence tiers.
Soil Assessment First
When you’re planning multi-level living fences, a thorough soil assessment provides the foundation for your entire project’s success.
Before breaking ground, you’ll need to determine your soil’s type, pH levels, and nutrient content, as these factors directly impact which plants will thrive in your terraced landscape and how you’ll combat soil erosion between levels.
Conduct your assessment by:
- Taking soil samples from multiple locations and depths within your planned terrace area
- Testing pH levels with a home kit or sending samples to a local extension office
- Identifying soil texture by performing a simple ribbon test to determine sand, silt, and clay ratios
This information will guide your plant selection, drainage solutions, and amendment strategies, ensuring your living fence establishes strong roots and remains stable for years to come.
Slope Mapping Technique
Once you’ve completed your soil assessment, mapping the slope of your property becomes the critical next step in creating successful multi-level living fences.
Begin your slope mapping technique by using a level or A-frame to identify the high and low points across your garden area.
Place stakes at 3-4 foot intervals along the planned terrace lines, connecting them with string to visualize each tier. These marked levels should follow the natural contours of your land to guarantee proper drainage.
As you map, measure distances accurately and note any existing vegetation or obstacles that might affect your design.
Before moving forward with excavation, double-check all measurements and alignments. This careful mapping prevents costly mistakes later and creates the foundation for terraces that will support your living fence system effectively.
Level Markers Installation
With your slope map as a guide, the next practical step involves setting up level markers to physically define your terrace boundaries.
Begin at the garden’s highest point, establishing a straight reference line using a leveling tool. This foundation guarantees your future retaining wall sits perfectly level across the entire span.
Next, use stakes and string to outline each terrace boundary:
- Mark the highest point and establish a level reference line across the intended area
- Position stakes at 2-4 foot intervals between terraces, depending on your slope’s steepness
- Double-check your level markers installation with a laser level, making adjustments as needed
Don’t forget to label each terrace level with temporary flags or paint to prevent confusion during excavation and construction phases of your project.
Building Effective Retaining Structures
Four key elements define successful retaining structures in living fence installations.
First, select appropriate materials—natural stone, concrete blocks, or timber—based on your garden’s aesthetic and structural needs.
Second, incorporate proper drainage systems using weep holes or gravel backfill to prevent water damage and pressure buildup behind the retaining wall.
Third, respect height limitations. Walls exceeding four feet typically require professional engineering support to guarantee safety and stability.
Finally, consider both function and beauty by creating planting nooks or using decorative finishes that complement your garden design.
Don’t neglect maintenance—regularly inspect your retaining structures for cracks or shifting to preserve their integrity.
With careful planning and proper construction techniques, your retaining walls will provide both stability and visual appeal for your terraced living fence installation.
Soil Preparation and Erosion Control Techniques

Effective soil preparation serves as the foundation of any successful multi-level living fence. Begin by testing soil pH and nutrient levels to guarantee compatibility with your chosen plants.
Mix organic matter like compost into the base soil to improve fertility and drainage for healthy root development.
To prevent erosion between tiers, implement these proven techniques:
- Layer biodegradable materials like cardboard between levels to stabilize soil while maintaining moisture.
- Plant deep-rooted species on upper tiers to anchor soil and minimize runoff.
- Establish ground cover plants on lower tiers as an additional erosion barrier.
Maintain your terraced structure by regularly adding compost and mulch to replenish nutrients.
This ongoing soil preparation will guarantee your living fence remains healthy and structurally sound for years to come.
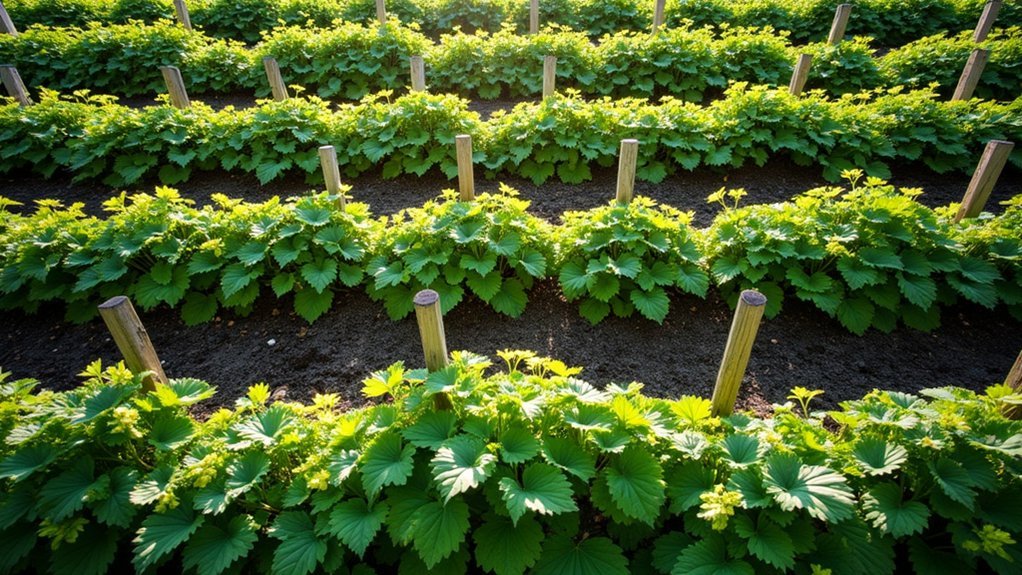
Planting Methods for Durable Living Barriers
Because the longevity of your living fence depends greatly on proper planting techniques, you’ll need to implement methods that promote strong establishment from day one.
Start by arranging plants in strategic layers, placing taller species at the back and shorter varieties in front to create depth and maximize your outdoor barrier’s effectiveness.
Prioritize native plants that are naturally adapted to your local climate and soil conditions—they’ll require less maintenance and prove more resilient over time.
Incorporate deep-rooted species to stabilize soil and prevent erosion, especially essential in terraced designs.
For year-round privacy, blend deciduous and evergreen varieties.
Maintain regular pruning schedules to encourage bushy growth and control density.
This balanced approach guarantees your living fence remains functional and visually appealing through all seasons.
Irrigation Systems for Multi-Level Fences
While establishing your multi-level living fence, proper hydration becomes the critical foundation for long-term success. Drip irrigation offers the most efficient solution, delivering water directly to root zones across your terraced structure.
Implement a zoned irrigation system that addresses the unique needs of each tier:
- Position drip lines along the base of plants on each level, guaranteeing maximum absorption while minimizing water loss through evaporation.
- Incorporate rainwater harvesting to create a sustainable water source, collecting runoff from the living fence itself.
- Schedule regular maintenance checks to prevent clogs and guarantee proper drainage throughout your system.
You’ll want to tailor watering schedules for different sections based on sun exposure and plant requirements. This customized approach guarantees your living fence thrives at every level while conserving water resources.
Maintenance Schedule for Healthy Growth
Maintaining a thriving multi-level living fence requires a consistent care routine throughout the seasons. Your maintenance schedule should include checking soil moisture levels weekly, as plants at different tiers may have varying water requirements.
Every 4-6 weeks during growing season, apply organic fertilizer to enrich the soil and promote vigorous growth across all levels.
After heavy rainfall, inspect your living fence structure for erosion or damage, addressing issues promptly to protect root systems and soil integrity.
Implement seasonal pruning to control growth and remove dead or diseased branches, preventing overcrowding and maintaining plant health.
Finally, establish a bi-weekly weeding routine to eliminate competition for resources. This systematic approach guarantees your multi-level living fence develops strong roots and lush foliage for years to come.
Seasonal Care and Pruning Techniques
Four distinct seasons demand tailored approaches to caring for your multi-level living fence. Your seasonal care strategy should begin with late winter pruning, removing dead branches before new growth emerges. This maintains the fence’s shape and promotes healthy development throughout the growing season.
- Spring – Apply balanced organic fertilizer as new shoots appear, boosting overall health and encouraging robust growth.
- Summer – Apply mulch around the base to retain moisture, suppress weeds, and regulate soil temperature during hot periods.
- Fall/Winter – Continue monitoring moisture levels and plan your pruning strategy for late winter.
Remember to inspect regularly for damaged branches year-round and remove them promptly to prevent disease spread and improve airflow throughout your living fence structure.
Frequently Asked Questions
How Do You Install a Fence Step by Step?
Measure your area, mark boundaries with stakes. Dig post holes, set posts in concrete, let it cure. Attach fence panels ensuring they’re level. Install gates with hinges and latches, then test their functionality.
Should Fence Posts Be Set in Concrete or Dirt?
You’ll want to set your fence posts in concrete for stability in windy areas or unstable soil. If you’re seeking a quicker, cheaper option, dirt works for temporary fences but requires more maintenance.
How Far Apart Should Posts Be for Cattle Fence?
For cattle fencing, you’ll want to space your posts 8-10 feet apart. In rough terrain or high-pressure areas, reduce spacing to 6-8 feet. This guarantees your fence remains sturdy and effective against cattle movement.
How Do You Install a Fence on a Sloped Ground?
You’ll need to use either a stepped or contoured approach. For stepped, keep panels horizontal while posts vary in height. Use a string line between end posts to guarantee alignment as you follow the slope.
In Summary
You’ve now mastered the art of terraced living fences! By following these steps, you’ll enjoy enhanced privacy, improved biodiversity, and a stunning landscape feature that evolves with the seasons. Remember to maintain your irrigation system and stick to your pruning schedule. With proper care, your multi-level living fence won’t just survive—it’ll thrive, becoming more beautiful and effective with each passing year.


Leave a Reply