Properly preparing hedge root balls before planting guarantees successful establishment and growth. You’ll reduce transplant shock, stimulate healthy root development, and improve nutrient uptake by removing constraints like burlap and wire baskets. Trimming damaged roots, loosening compacted soil, and thoroughly hydrating the root ball creates ideal conditions for roots to expand into surrounding soil. Timing your preparation during the dormant season greatly enhances survival rates. The following techniques will transform your hedges from mere survivors to vigorous, thriving boundaries.
Understanding Root Ball Structure and Health
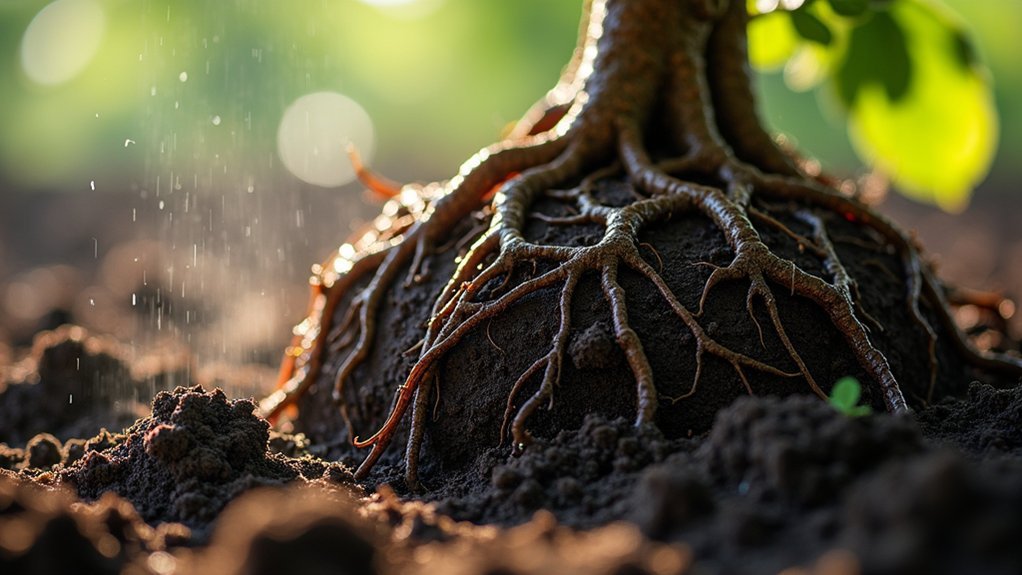
The integrity of a hedge’s root ball serves as the foundation for its future growth and importance in your landscape.
A strong root ball anchors your hedge for optimal development and lasting landscape impact.
When you’re handling root ball hedging, you’re actually managing a complex ecosystem designed to support your plant’s progression. The soil mass surrounding the root system provides essential moisture and nutrients that minimize transplant shock.
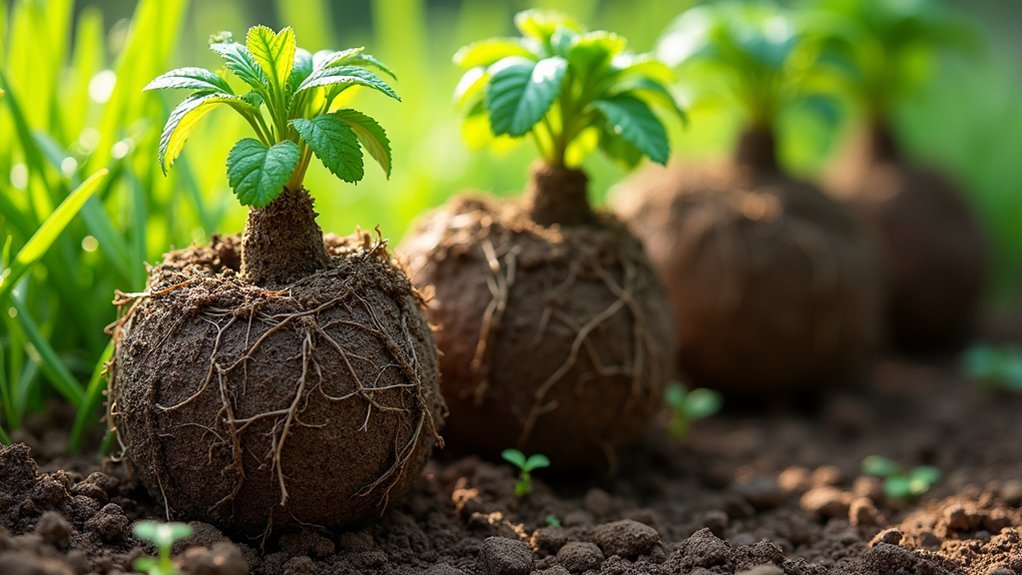
You’ll need to examine your root ball carefully before planting. A healthy structure should be firm and intact, with the soil holding the roots securely together.
If you notice damaged areas or exposed roots, your hedge may struggle to establish itself. The root system within the ball should appear vigorous with living, light-colored roots—not brown or mushy ones.
Proper root ball condition directly impacts how quickly your hedge will recover and thrive in its new home.
Benefits of Proper Root Ball Preparation
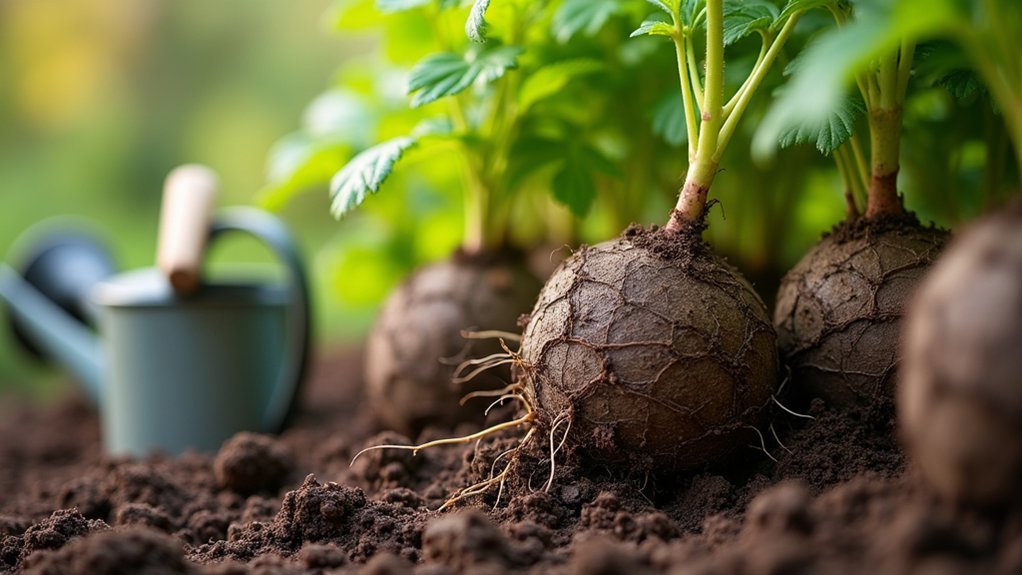
Investing time in proper root ball preparation yields considerable rewards for your new hedges.
When you inspect and trim damaged roots, you’re actively promoting healthier growth and preventing transplant shock that often occurs during planting.
A moist, well-structured root ball establishes a robust root system faster, considerably increasing your hedge’s chances of thriving in its new location.
You’ll find planting much easier with properly prepared root balls, reducing the risk of root damage and minimizing plant stress.
Essential Tools and Materials for Root Preparation
Successful hedge planting begins with having the right tools and materials at hand before you tackle root ball preparation.
Proper preparation prevents poor performance—gather your essential tools before handling any root balls.
You’ll need a sharp spade for digging and lifting the root ball, along with pruning shears to trim damaged roots and a garden fork to loosen surrounding soil.
Don’t forget biodegradable wrapping materials like hessian or burlap, which protect and stabilize the root ball during transport.
A quality soil amendment such as well-rotted compost or bone meal will support root establishment and provide essential nutrients.
Keep a measuring tape nearby to verify your trench dimensions accommodate the root ball properly.
Finally, have a watering can or hose ready to thoroughly soak the planting area both before and after positioning your hedge, maintaining ideal moisture for healthy root development.
Removing Burlap and Wire Constraints
You’ll need to remove all burlap and wire constraints from your hedge root balls to prevent the devastating effects of root girdling and guarantee proper nutrient uptake.
Cutting away burlap from the top and sides while completely eliminating wire baskets allows roots to spread freely into surrounding soil, greatly enhancing root health.
This simple but critical step prevents growth restrictions and dramatically improves your hedge’s chances of establishing itself successfully in its new environment.
Root Health Enhancement
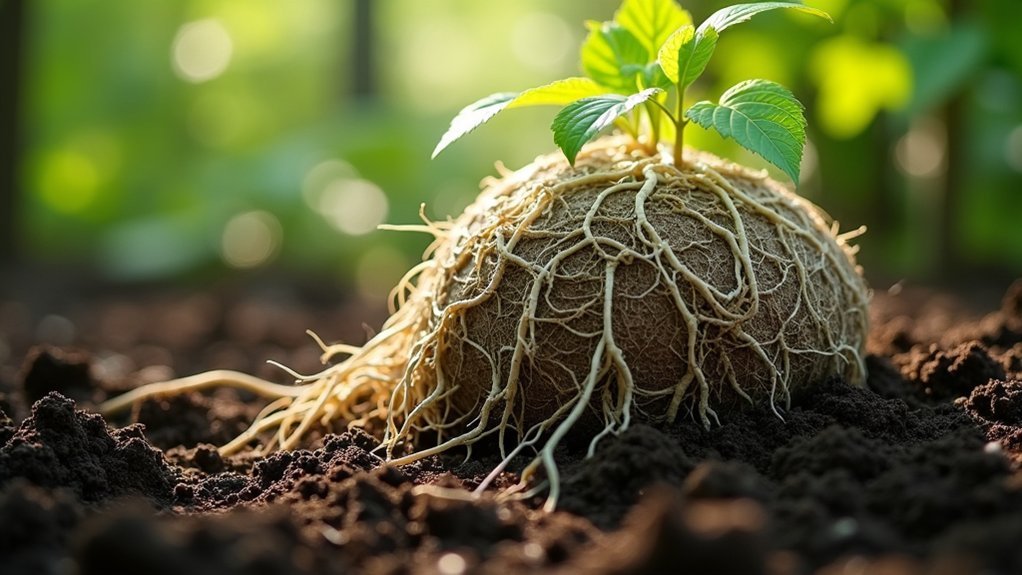
Although burlap and wire cages protect root balls during transportation, they become obstacles to growth once planting begins. When you remove these constraints before planting hedging, you’re actively enhancing root health by allowing roots to expand freely into the surrounding soil.
Left intact, burlap decomposes slowly and can considerably restrict root development, limiting access to essential nutrients and moisture. By cutting away all wire, synthetic materials, and burlap, you’ll prevent root girdling and encourage the formation of new lateral roots important for nutrient absorption.
This simple step dramatically improves your hedge’s establishment, creating a stronger foundation for future growth. Proper root health enhancement leads to more resilient plants that withstand environmental stresses better and develop robust root systems that support vigorous, sustainable growth for years to come.
Preventing Growth Restrictions
Properly removing burlap and wire constraints represents one of the most critical yet overlooked steps in hedge planting success.
When you leave these materials intact, they create barriers that physically restrict root growth, forcing roots to circle within the confines of their original shape.
You’ll need to cut away burlap and wire from the top and sides of the root ball while maintaining the bottom for initial stability.
This approach prevents the girdling effect where roots fundamentally choke themselves as they attempt to expand.
Left unchecked, these constraints lead to stunted growth, poor nutrient absorption, and increased vulnerability to drought and disease.
Stimulating Root Growth Before Planting
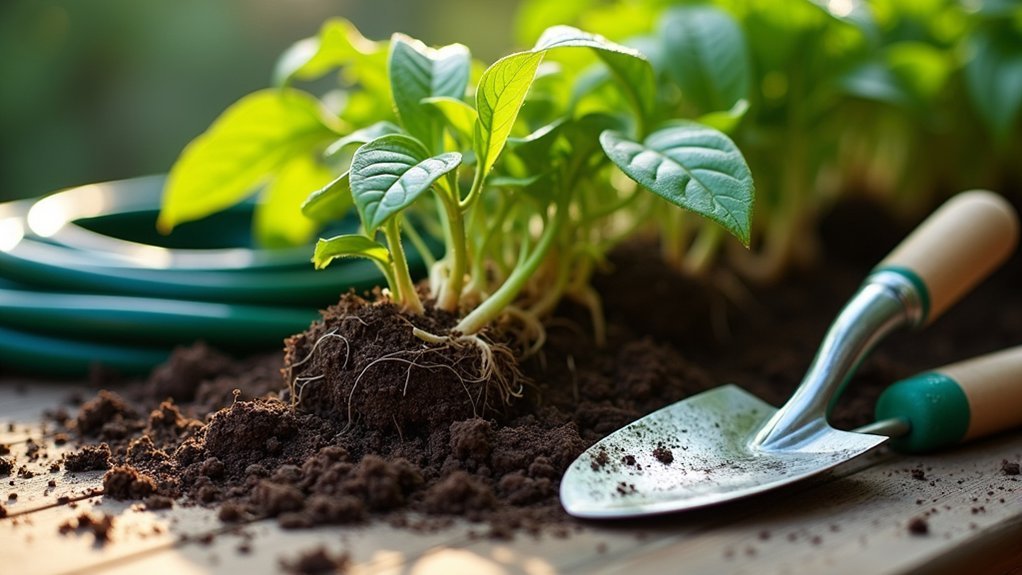
Before your hedge takes root in its permanent location, stimulating healthy root development can greatly improve establishment success.
Begin by inspecting the root ball and trimming any dead or damaged roots, which encourages vigorous new growth when planted. Soaking the root ball thoroughly guarantees proper hydration, considerably reducing transplant shock.
Gently loosen the outer roots before planting to help them spread into surrounding soil rather than continuing to grow in their nursery pattern.
Apply beneficial mycorrhizal fungi supplements to enhance the roots’ ability to absorb moisture and nutrients in their new environment.
After planting, maintain consistent soil moisture for several weeks.
This critical period supports new root establishment as they extend into the surrounding soil, creating a strong foundation for your hedge’s long-term health.
Addressing Root Circling and Compaction
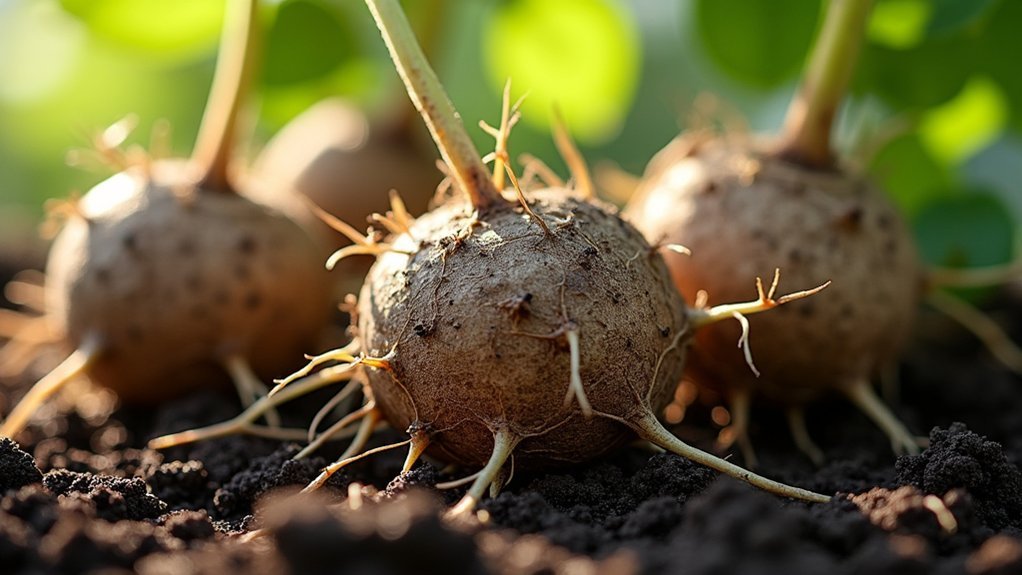
Root circling and compaction present notable challenges that you’ll need to address before planting your hedge. When roots grow in circular patterns within confined root balls, they restrict nutrient absorption and limit future growth potential.
Examine your root ball hedges carefully, looking for roots that wrap around the exterior. Using sharp pruners, trim these circling roots to encourage outward growth rather than continued constriction.
Inspect and trim circling roots to promote healthy outward growth and prevent future constriction.
Next, break up compacted soil by gently loosening the outer edges of the root ball with your fingers. This preparation notably reduces transplant shock by allowing root systems to establish quickly in their new environment.
Roots that can spread freely will access more water and nutrients, resulting in healthier, more vigorous hedges. Don’t skip this critical step—proper root preparation now prevents stunted growth and plant failure later.
Watering Techniques for Pre-Planting Success
Proper hydration of your hedge’s root ball through deep soaking for several hours will greatly reduce transplant shock and promote healthy establishment.
You’ll want to time this essential pre-planting soak about 24 hours before installation, allowing roots to fully absorb moisture while still being manageable for handling.
Using lukewarm rather than cold water can further encourage root activity and prevent additional stress, especially when planting during cooler seasons.
Deep Soaking Root Balls
The most critical step before planting your hedge is thoroughly saturating the root ball. This essential soil preparation technique guarantees your new plants establish quickly and thrive in their permanent location.
Submerge root balls in a water container for at least 30 minutes, allowing them to absorb 5-10 liters depending on size.
This thorough soaking offers two major benefits: it guarantees water and nutrients reach every part of the root system and loosens compacted soil around delicate roots.
When properly hydrated before planting, roots can more easily expand into surrounding garden soil, reducing transplant shock considerably.
Perform this soaking immediately before planting—don’t leave roots submerged for hours, as excessive saturation risks root rot.
Your hedge will thank you with robust growth and faster establishment.
Hydration Timing Matters
While many gardeners understand the importance of watering newly planted hedges, timing your pre-planting hydration correctly can make the difference between thriving plants and those that merely survive. Proper root ball hydration should begin at least 24 hours before planting to minimize transplant shock.
| Timing | Hydration Technique | Benefit |
|---|---|---|
| 24+ hours before | Full immersion soaking | Complete root ball saturation |
| During planting | Slow, steady stream | Prevents soil erosion |
| Post-planting | Deep penetration watering | Encourages deeper root growth |
You’ll want to guarantee water reaches deep into the root ball, not just the surface. For evergreens, consider misting foliage in dry conditions. This thorough approach to hydration timing doesn’t just help plants survive the planting process—it sets them up for long-term establishment and resilience against environmental stressors.
Water Temperature Considerations
Most gardeners overlook water temperature when preparing hedge root balls, yet this subtle factor greatly impacts transplant success.
Room temperature water is ideal for soaking root balls, as it prevents thermal shock while promoting peak moisture absorption.
Cold water can greatly slow root metabolism, hampering the establishment process your new hedges need to thrive. In contrast, warm water accelerates absorption and stimulates root growth right from the start.
When preparing your hedges, soak root balls for at least 30 minutes in the early evening to minimize evaporation and maximize hydration.
Before planting, always check soil moisture levels around the root ball. If the soil feels dry beyond the surface, additional soaking may be necessary.
This simple step guarantees your hedges have the best possible foundation for robust growth.
Timing Your Root Ball Preparation for Optimal Results
Selecting the right time to prepare your hedge root balls can considerably impact their survival and growth rates after transplanting. The dormant season, spanning late autumn to early spring, offers ideal conditions for root ball preparation, as plants experience minimal stress during this period.
- Prepare root balls when soil is moist but not frozen or waterlogged to maintain the integrity of your planting site.
- Aim for overcast days with minimal wind to reduce moisture loss from exposed roots.
- Schedule your timing to allow for immediate replanting, minimizing the period roots remain out of soil.
- Consider local climate patterns—cooler regions may require earlier preparation in autumn.
- Align your preparation timing with site readiness, ensuring your planting site is properly prepared.
Frequently Asked Questions
Should You Break up a Root Ball Before Planting?
No, you shouldn’t break up root balls before planting. It’ll damage roots and cause transplant shock. Instead, gently score tightly bound roots and guarantee your planting hole is properly sized to accommodate the intact root ball.
Why Soak Roots Before Planting?
You’ll want to soak roots before planting to hydrate the root ball, reduce transplant shock, and improve nutrient absorption. It also loosens compacted soil, allowing roots to spread more easily in their new environment.
How Do You Prepare a Root Ball for Planting?
To prepare a root ball for planting, you’ll need to trim damaged roots, moisten the ball thoroughly, keep the hessian sack intact, dig an appropriately sized trench, and backfill carefully while removing air pockets.
What Is the Purpose of a Root Ball?
Root balls protect your plant’s essential root systems during transplanting. They’ll minimize shock by preserving soil and moisture around roots, allowing plants to establish quickly in their new location with minimal stress or damage.
In Summary
By properly preparing your hedge’s root ball, you’re giving it the best chance at thriving in its new home. Don’t skip this essential step—it prevents transplant shock, encourages healthy root expansion, and establishes stronger plants. Take time to loosen bound roots, remove all packaging materials, and properly hydrate before planting. Your efforts now will reward you with vigorous, well-established hedges for years to come.

Leave a Reply