
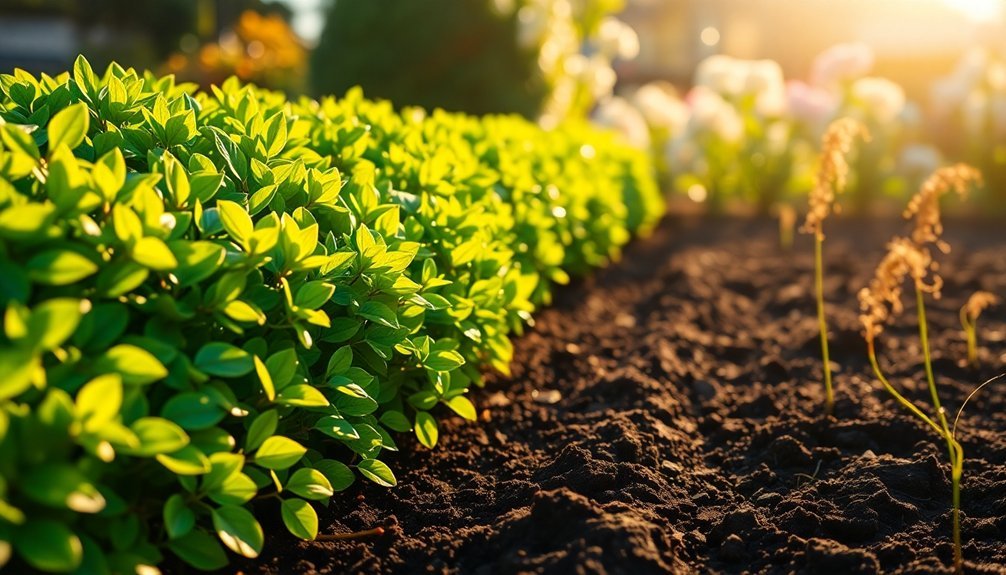
The perfect hedge border combines careful species selection with proper site preparation and consistent maintenance. You'll need to assess your garden's conditions, choose plants suited to your climate, and prepare soil with organic amendments. Plant at the right spacing and time of year, then follow a regular watering, mulching, and pruning schedule to encourage dense growth. Master these fundamentals and you'll transform your garden boundaries into stunning living walls that enhance your property for decades.
Step-By-Step Hedge Planting Tutorial

Five key preparations will set your hedge border up for success. Start by clearing all weeds and debris from your planting area.
Then assess your location for proper sunlight conditions based on your chosen hedge species. Prepare a strip 60-90cm wide, thoroughly rotavating the soil and incorporating organic compost to boost nutrient levels.
Success begins with sunlight assessment and soil preparation—create nutrient-rich foundations for your hedge to thrive.
When planting, use stakes and string to guarantee straight lines, or opt for a zig-zag pattern for denser growth. Apply beneficial mycorrhizal fungi like Rootgrow to enhance root development and nutrient absorption. Dig trenches slightly deeper than your root balls and perforate the sides with a fork to encourage root spread.
Space plants according to species—larger varieties like Leylandii need more room, while compact plants like Buxus work at 20-30cm intervals. After positioning, firm soil gently around roots, water thoroughly, and apply mulch to retain moisture and suppress weeds.
Assessing Your Garden's Needs and Conditions
Before selecting your perfect hedge plants, you'll need to thoroughly evaluate your garden's unique conditions to guarantee long-term success. Examine your site's sun exposure, soil composition, and drainage patterns. Check for potential obstacles like tree roots, buried debris, or aggressive weeds that might compete with your new hedge. Regular site evaluation becomes essential after installation to ensure your hedge continues to thrive as conditions evolve.
| Condition Factor | Impact on Hedges | Your Action Plan |
|---|---|---|
| Poor Drainage | Root rot & stunted growth | Create raised beds or install drainage |
| Heavy Clay Soil | Slow establishment, poor vigor | Amend with organic matter |
| Extreme Sun/Shade | Stressed plants, sparse growth | Choose specifically adapted varieties |
Don't forget to take into account your local climate zone, typical precipitation levels, and temperature extremes. Testing soil pH and nutrient availability will further refine your plant selection process, ensuring you choose hedge varieties that will thrive in your specific microclimate.
Selecting the Right Hedge Species for Your Climate

Choosing the right hedge species for your climate stands as perhaps the most critical decision in creating a successful garden border.
Consider your local soil conditions, as most hedges prefer well-drained soil, while some can handle clay or waterlogged areas.
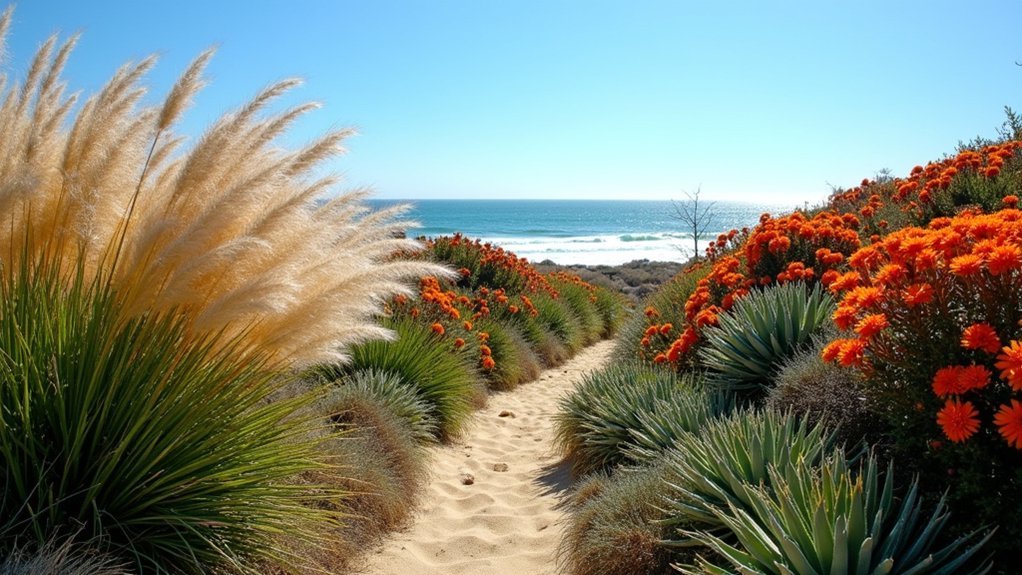
Temperature tolerance is essential—select plants adapted to your region's heat or cold extremes. Coastal gardeners should opt for salt-tolerant varieties like Elaeagnus, while windy locations benefit from drought-resistant options such as Jamaican Dogwood.
Humidity levels matter too; Simpson Stopper thrives in moisture-rich environments, while Jamaican Caper requires minimal watering. Selecting hedges that provide practical benefits like wind reduction and noise buffering can enhance your property's livability.
Remember that native species typically require less maintenance since they're already adapted to local conditions.
For year-round privacy, choose evergreens like Boxwood with dense foliage, but if you're seeking seasonal interest, consider flowering or berrying varieties.
Planning Your Hedge Layout and Spacing
Properly spacing your hedge plants guarantees healthy growth patterns while creating a unified border that defines your landscape.
You'll want to position the first and last plants at half the standard spacing distance from the edge, allowing foliage to fully develop at the ends of your hedge.
For a fuller appearance, consider a staggered double-row configuration that enhances visual flow while maintaining adequate growing room for each plant. When planning these double rows, diagonal spacing between plants should be approximately 25% more than what you would use in a single row design.
Spacing for Growth Patterns
While creating your perfect hedge border, understanding proper spacing is imperative for achieving ideal growth patterns and long-term success.
Consider both your hedge type and desired height when determining plant spacing. For evergreen shrubs, plant 1-4 per metre (25-100cm apart), while deciduous hedges typically require 3-7 plants per metre in single or double rows.
Fast-growing conifers like Leylandii generally need 2 plants per metre for hedges under 2 metres tall. A good rule of thumb for taller hedges is spacing plants at one-quarter of the proposed final height.
Denser planting creates fuller hedges faster but increases competition for nutrients. Adequate spacing also prevents overcrowding issues which can negatively affect the overall health of your hedge. Remember that regular pruning is vital regardless of spacing—begin when plants reach half their desired height to encourage proper branching and thickness.
Strategic Border Zones
Strategic border zones transform an ordinary hedge into a purposeful landscape element that enhances your property's overall design.
Begin by defining your primary objective – privacy, boundary marking, or aesthetics – to determine ideal placement and composition.
When planning your layout, analyze site conditions carefully. Assess sunlight patterns, soil quality, and available space before selecting plants. You'll achieve better results by choosing species that naturally thrive in your specific environment.
Consider creating depth through vertical layering, using taller plants as anchors with lower-growing varieties in front. This approach adds visual interest while maximizing functionality.
Where possible, incorporate "borrowed views" from neighboring landscapes to extend your garden visually.
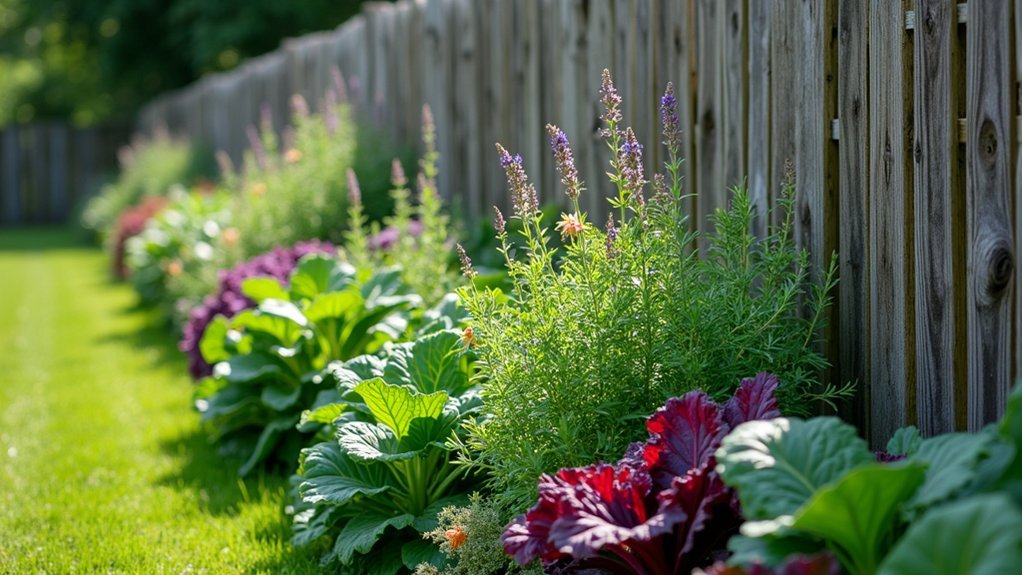
For sustainable borders, combine evergreen and deciduous plants in strategic zones to provide year-round structure with seasonal variety and wildlife support. Including native species in your hedge design will significantly enhance the ecological benefits while reducing maintenance requirements.
Visual Flow Management
Beyond defining strategic zones, successful hedge borders require thoughtful layout planning to guide the eye through your landscape.
Consider both horizontal coverage and vertical growth when mapping your design, balancing shrub sizes for visual harmony.
You'll achieve better visual flow by spacing plants properly, allowing adequate aeration while creating a cohesive appearance.
For formal entrances or architectural features, choose compact, uniform shrubs like boxwood. If you prefer informal, flowing borders, mix plants with varied leaf sizes, colors, and textures.
Create distinct garden zones or pathways using your hedge layout, directing movement through your space.
Remember that early pruning leads to thicker growth near the base, establishing stronger visual lines.
For year-round appeal, incorporate evergreens as structural anchors, then add seasonal flowering elements to enhance interest throughout the changing seasons. When designing your hedge layout, consider using a stacked area chart to visualize how different plant heights will interact across your garden space.
Soil Preparation and Amendment Techniques
Before planting your hedge border, you'll need to test your soil's pH and nutrient composition to guarantee ideal growing conditions.
You can enrich your soil foundation by breaking up compacted areas with a garden fork and incorporating organic amendments like compost or well-rotted manure.
These improvements will enhance drainage, aeration, and nutrient availability, giving your new hedge the strongest possible start.
For heavy clay soils, consider creating raised mounds to significantly improve drainage and prevent root rot in your hedge plants.
Testing Soil Composition
Since the foundation of a thriving hedge border begins underground, testing your soil composition is an essential first step in the planting process. Most hedges prefer slightly acidic to neutral soil (pH 6.0-7.0), so knowing your baseline helps determine necessary amendments.
Collect soil samples from multiple spots along your planned hedge line, about 6-8 inches deep. Send these to a local agricultural extension service or use a home testing kit to determine pH and nutrient levels. The results will guide your next steps.
If your soil is too acidic, you'll need to add lime; if too alkaline, sulfur can lower the pH. Don't guess at quantities—follow test recommendations to avoid over-correction. For best results, incorporate organic matter into your soil to enhance structure and provide essential nutrients for long-term hedge health.
Remember that soil structure (sand, silt, clay ratio) also affects how nutrients are retained and how your hedges will grow.
Enriching The Foundation
Soil preparation mastery stands as the cornerstone of successful hedge establishment. Your focus should be creating an environment where roots thrive and spread easily.
Add generous amounts of organic matter like compost or well-rotted manure to improve structure and enhance biological activity.
Don't overlook drainage—incorporate materials like perlite or gypsum, especially in clay soils. You'll want to perforate trench sides with a garden fork to encourage lateral root growth.
Remember to level the soil surface carefully to prevent waterlogging issues.
Apply a layer of organic mulch to regulate soil temperature, keeping roots cool in summer and warm in winter.
Consider soil pH adjustments based on your chosen hedge species. Most hedge plants thrive within a pH range 5.8-6.8, similar to vegetable gardens. With consistent moisture management and proper spacing, you're setting the stage for a hedge that's not only beautiful but structurally sound for years to come.
Timing Your Hedge Planting for Optimal Growth
Selecting the right time to plant your hedge can dramatically impact its establishment and long-term health. For most hedges, early autumn is ideal as it allows roots to establish before winter sets in. Evergreens thrive when planted in early autumn, while deciduous varieties perform best from mid-autumn through late winter.
Consider your climate zone when planning. In frost-prone areas, delay planting frost-sensitive varieties until spring. The type of hedge matters too—bare root plants must be planted during dormancy (November-April), while pot-grown options offer more flexibility. Pot grown hedging plants can be planted year-round, except during periods of frozen ground or extreme heat.
Never plant in frozen or waterlogged soil. Remember that complete establishment takes two to three years, so patience is essential.
For budget-conscious gardeners, bare root plants offer cost savings but require immediate attention upon arrival.
Proper Planting Depth and Root Management
Achieving a flourishing hedge border begins with mastering proper planting depth and root preparation. Dig trenches twice as wide as your plants' root structures, ensuring root balls sit just below ground level with about 1" of plant showing above soil. For informal hedges, intertwining of plants creates a fuller appearance that enhances the natural border effect.
| Planting Element | Best Practice |
|---|---|
| Trench Depth | Root ball plus 1" above ground |
| Root Preparation | Trim damaged roots, fold burlap down |
| Soil Firming | Eliminate air pockets around roots |
| Mulching | 2-3" layer, keep away from trunk |
Before backfilling, perforate trench sides with a garden fork to encourage outward root growth. For clay soils, add gypsum or create raised mounds to improve drainage. After planting, water deeply to help roots establish quickly. Remember that proper initial planting depth prevents many future issues including poor growth and disease susceptibility.
Watering Regimens for Newly Established Hedges

Proper watering forms the backbone of successful hedge establishment after planting. Your new hedge requires an immediate thorough soaking with 10-20 litres per meter, then regular applications of 5-10 litres twice weekly during dry periods.
Water deeply at the base of plants rather than on foliage, ensuring moisture reaches the entire root zone. Morning is the ideal time for watering. The first two years are absolutely critical for developing a strong root system that will support your hedge for decades to come.
You'll need to adjust your regimen based on your hedge species – leylandii and cherry laurel demand more moisture than yew and deciduous varieties.
Consider your soil type too; sandy soils need more frequent watering than clay. Apply mulch to retain moisture and regulate soil temperature.
For larger hedges, drip irrigation systems or leaky hoses offer efficient, consistent hydration throughout the essential two-year establishment period.
Mulching Strategies to Support Hedge Health
While your hedge establishes its root system, a well-planned mulching strategy delivers multiple benefits that greatly impact long-term health and vigor. Apply a 3-4 inch layer around your hedges, leaving space near the stems to prevent moisture damage. Proper mulching helps suppress weeds and reduces competition for nutrients that your new hedge plants need.
| Mulch Type | Best For |
|---|---|
| Pine Needles | Erosion control, acidic soil plants |
| Wood Bark | Temperature insulation, durability |
| Shredded Leaves | Nutrient addition, soil structure |
| Compost | Microbial activity, fertility boost |
| Straw | Cost-effective moisture retention |
Choose mulch that suits your climate—insulating against frost in northern regions or conserving moisture in southern areas. Refresh your mulch periodically as it decomposes, and consider incorporating compost to enhance soil fertility. Remember that different mulches affect soil pH, so match accordingly with your hedge species.
Initial Pruning to Encourage Dense Growth

The foundation of a stunning hedge lies in its initial pruning, a critical step that transforms sparse plantings into lush, impenetrable barriers.
You'll need to understand apical dominance—when you clip a stem, it promotes multiple shoots from each cut, creating that desired thickness.
For ideal density, clip at least half of all new shoots three to four times annually. This consistent attention prevents uneven growth while maintaining your preferred shape.
Always start at the base and work upward, ensuring the top remains slightly narrower than the bottom to allow sunlight to reach lower branches. Aim for a sloped shape during each pruning session to prevent bare, unsightly bases caused by insufficient light.
Choose the right tools for the job: hand pruners for detailed work, hedge shears for precision cuts, and loppers for thicker branches.
Remember—sharp, clean tools make cleaner cuts that heal faster and prevent disease spread.
Supporting Young Plants During Establishment
Successfully establishing young hedge plants requires consistent care during their vulnerable first months. Focus on maintaining proper soil moisture—not too wet or dry—to prevent root rot while supporting healthy development.
Apply a 2-3 inch layer of mulch around each plant, keeping it away from stems to suppress weeds and retain moisture.
Protect young hedges from harsh environmental elements by installing temporary windbreaks or shade cloth during extreme weather. For plants on slopes, consider small terracing to prevent erosion and water runoff.
Monitor regularly for pest activity and address issues promptly with appropriate organic or chemical controls.
During the first growing season, apply a balanced fertilizer according to your soil test results. This nurtures strong root systems and foliage development, setting the foundation for a healthy, vibrant hedge border.
Creating Natural Curves and Formal Lines
Creating a hedge design that truly transforms your garden space requires mastering both natural curves and formal lines. Use shrubs like euonymus and correa for natural curves, while dwarf boxwood and yaupon holly work perfectly for formal hedges.
When designing curved borders, lay out a hose or rope to guide your shape, ensuring smooth shifts that create the illusion of a larger space.
For formal elements, regular pruning is essential to maintain crisp lines. Plant formal hedges closer together for density.
The magic happens when you balance both styles—contrast structured hedges with flowing curves to enhance visual interest. This combination creates dynamic spatial relationships while guiding visitors through your garden.
Consider both aesthetics and practicality by selecting plants that offer year-round appeal and match your maintenance capacity.
Seasonal Maintenance Calendar for Healthy Hedges
To establish truly thriving hedges that maintain their beauty year-round, you'll need to follow a dedicated seasonal maintenance schedule. Your hedge border requires different care depending on the season, with each period offering opportunities to enhance growth and address specific challenges.
| Season | Key Tasks | Tips |
|---|---|---|
| Spring | Plant new hedges, trim after first growth, apply fertilizer | Water deeply to establish roots |
| Summer | Regular trimming, weekly watering for new plants, pest monitoring | Mulch to retain moisture during heat |
| Fall/Winter | Final trim before frost, clear leaves, add compost, protect with mulch | Use frost-free days for renovation pruning |
Remember to adjust your maintenance routine based on your regional climate and the specific hedge varieties you've chosen for your border.
Frequently Asked Questions
Can I Plant a Hedge Along My Property Boundary Line?
Yes, you can plant a hedge along your property boundary, but first check local regulations, consult neighbors, and consider hiring a surveyor to confirm exact boundaries before selecting suitable plants for your climate.
How Do Hedges Affect Relationships With Neighboring Properties?
Hedges can strengthen or strain your neighbor relationships. They'll provide privacy and boundaries, but require clear communication about maintenance, ownership, and growth management. Make certain you're discussing these aspects before planting along property lines.
Should I Mix Different Plant Species in My Hedge Border?
Yes, you should mix different plant species in your hedge border. You'll benefit from increased biodiversity, year-round visual interest, better wildlife support, and improved resilience against diseases, pests, and environmental stressors.
How Do Hedges Impact Home Value and Curb Appeal?
Well-maintained hedges can boost your home's value by up to 20%. They'll enhance curb appeal by framing architectural features, creating visual interest, and offering a luxurious appearance that makes your property stand out to potential buyers.
Can Existing Trees Be Incorporated Into a New Hedge Border?
Yes, you can incorporate existing trees into new hedge borders. They'll add dimension and visual interest if you plan carefully around their growth patterns, sunlight needs, and guarantee the design maintains balance.
In Summary
Creating your perfect hedge border isn't just about aesthetic appeal—it's about understanding your garden's unique conditions and choosing plants that will thrive there. With proper preparation, planting techniques, and consistent maintenance, you'll enjoy a stunning green boundary that enhances your outdoor space for years to come. Remember, patience is key—the most beautiful hedges are those you've nurtured through thoughtful care and timely attention.

Leave a Reply