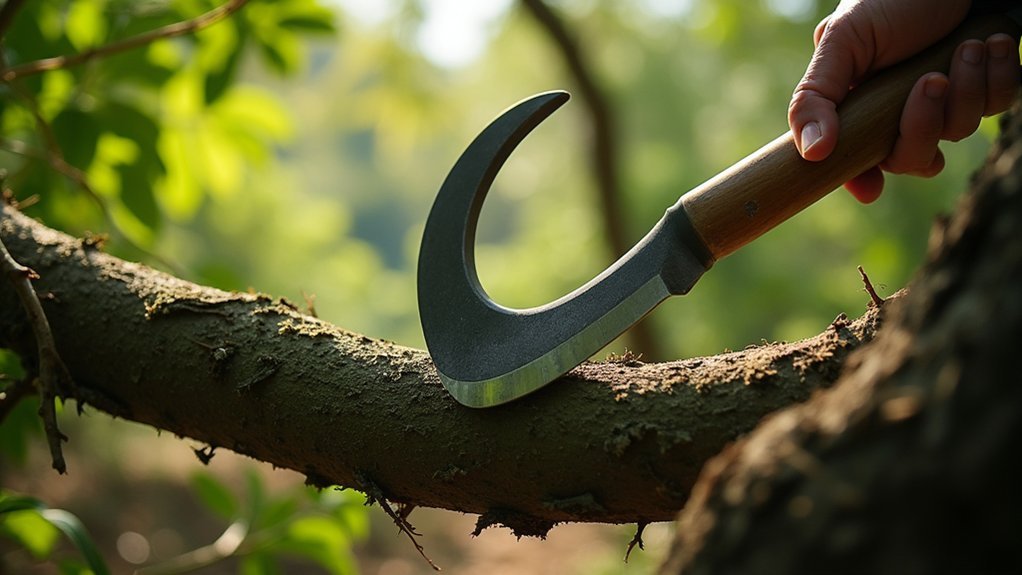
Mastering billhook techniques for hedge laying requires precision and proper form. You’ll need to maintain a 30-degree cutting angle for thin stems, adjusting to 45-60 degrees for thicker pleachers. Always preserve the bark strip to guarantee sap flow and use two-handed grips for better control. Keep your billhook sharp for clean cuts and position pleachers upward to encourage new growth. The right foot placement and grip tension transform your hedge laying from amateur to artisan.
10 Best Billhook Techniques For Traditional Hedge Laying

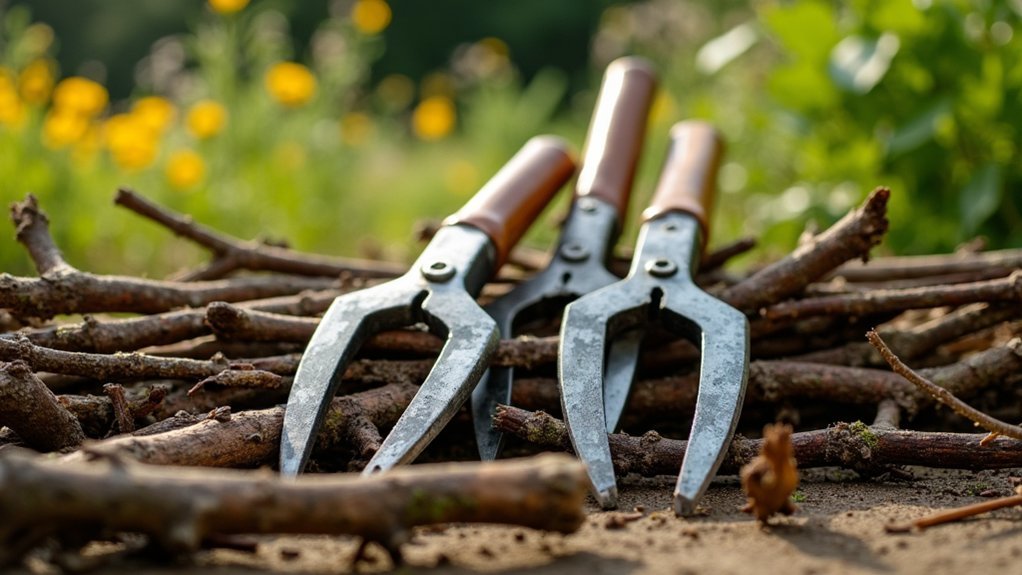
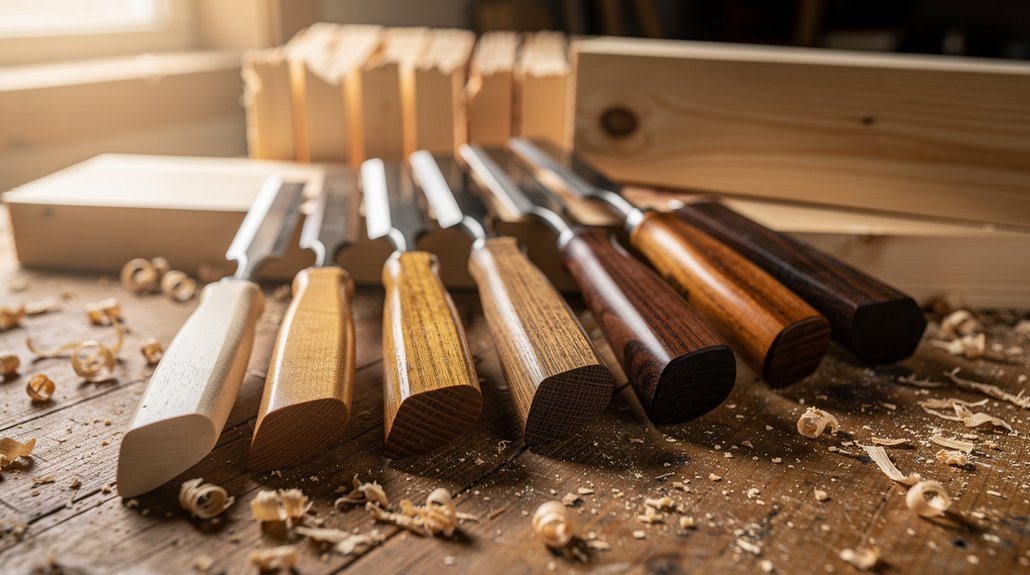
Every successful hedge layer knows that mastering billhook techniques is fundamental to traditional hedge laying. The Yorkshire billhook, with its straight or slightly curved blade, is your ideal tool for cutting and shaping pleachers effectively.
The Yorkshire billhook remains essential for any serious hedge layer seeking to craft durable, living boundaries with traditional techniques.
When laying a hedge, always cut stems at a 30-degree angle, leaving some bark and cambium intact to guarantee continued growth. Use a two-handed bill hook grip for thicker branches, giving you both power and precision during cuts.
Keep your billhook sharp—a dull blade makes clean cuts impossible and hampers healthy regrowth.
After making your primary cuts, use the tool to trim unwanted spurs and side shoots. This encourages a thicker hedge base and stimulates new growth from laid stems, resulting in a stronger, more resilient hedge structure.
The Essential Pleacher Cut: Mastering the Foundation Technique
Mastering the pleacher cut starts with your grip on the billhook—hold it firmly with your dominant hand while using your other hand to stabilize the stem.
Position your blade at a precise 30-degree angle at the stem’s base, applying controlled downward pressure to create a clean cut that leaves the essential strip of bark and cambium intact.
You’ll get better results by learning to read the wood fibers, watching for natural flex points in stems between 2-4 inches in diameter that will bend without breaking when laid horizontally.
Proper Grip Positioning
The foundation of a successful pleacher cut begins with your grip on the billhook. Position your dominant hand firmly at the handle’s end while your supporting hand grips near the curve of the blade. This proper grip creates the stability and control essential when laying hedges, allowing you to direct the vital 30-degree angle cut with precision.
When working the billhook, utilize your body positioning to generate force rather than relying solely on arm strength. Stand with feet planted firmly, angling your body toward the intended cut.
- Feel the confidence as the blade slices cleanly through the stem
- Experience the satisfaction of perfectly retained bark strips
- Notice the rhythm developing in your technique with each successful cut
- Enjoy the connection to centuries of traditional craftsmanship
Angle Matters Most
Three critical factors determine a successful pleacher cut, but angle supersedes them all. You’ll need to consistently achieve a 30-degree angle when making your pleacher cut—this precise angle guarantees stems lay flat while maintaining essential sap flow.
When using your Yorkshire billhook on larger stems, execute a smooth, controlled motion that cuts through most of the stem while preserving a small strip of bark and cambium. This partial connection enables healing and promotes robust regrowth, keeping pleachers in place for years to come.
Practice regularly to develop muscle memory for this critical 30-degree angle. Your consistency here directly affects the hedge’s structural integrity and longevity.
Reading Wood Fibers
While angle precision forms the backbone of effective pleacher cuts, your ability to read wood fibers elevates your technique from mechanical to masterful.
When cutting back stems, always observe and follow the wood’s natural grain. This guarantees a clean cut that minimizes damage while maximizing the pleacher’s strength.
Your Yorkshire billhook should slice with the grain, not against it, as you make your 30-degree angle cut. This preserves the critical strip of bark and cambium necessary for future growth.
- Feel the resistance change as your blade meets different fiber directions
- Experience the satisfaction of a perfectly laid stem that bends without breaking
- Witness new growth emerging from your expertly cut pleachers
- Master the rhythm of reading wood fibers that connects you to centuries of traditional craft
Selecting the Perfect Cutting Angle for Different Stem Sizes
You’ll need to adjust your billhook cutting angle based on the stem thickness you’re working with.
Thin stems require a shallow 30-degree angle, while medium stems work best with a 45-degree cut, and thicker pleachers demand a steeper 60-degree approach.
Matching your technique to the specific stem size will improve your hedge laying results while protecting the plant’s critical cambium layer for healthier regrowth.
Angled Cuts for Efficiency
Selecting the perfect cutting angle stands as one of the most critical skills in hedge laying. When you use a billhook for creating angled cuts, aim for approximately 30 degrees on standard stems to protect the cambium layer and guarantee healthy sap flow.
For thicker stems, increase to a 45-degree angle, which requires less effort and allows better penetration of your Yorkshire billhook.
- Feel the satisfaction of a clean, precise cut that will foster vibrant spring regrowth
- Master the technique that generations of hedgelayers have perfected through centuries
- Experience the rhythm and flow of consistent cutting that transforms a wild hedge into living architecture
- Connect with traditional craftsmanship that sustains both wildlife habitats and cultural heritage
Practicing on test stems helps develop muscle memory for consistent angles, improving your efficiency and minimizing damage to surrounding bark.
Stem-Specific Cutting Positions
Every stem presents a unique cutting challenge, requiring precise angle adjustments based on its diameter and flexibility. When working on either side of the hedge, you’ll need to adapt your technique accordingly.
| Stem Size | Recommended Angle | Cutting Technique | Key Benefit |
|---|---|---|---|
| Thin | 30 degrees | Light swing | Preserves cambium layer |
| Medium | 45 degrees | Moderate force | Ideal leverage |
| Thick | 60 degrees | Strong swing | Deep penetration |
| Mixed | Variable | Adaptive approach | Consistent results |
For thinner stems to be cut and laid properly, maintain a shallow 30-degree angle, working from the outside inward to protect the living lip. Medium stems require a 45-degree approach for balanced cutting efficiency. When tackling thicker portions, increase to 60 degrees, utilizing the billhook’s weight to reduce strain while ensuring the stem remains partially attached.
Two-Handed Power Strokes for Thicker Stems
Three key elements make all the difference when tackling thicker stems in hedge laying: proper grip, body position, and cutting technique. Unlike using an axe for hedgelaying, the billhook requires a secure two-handed grip to maximize leverage when you lay a hedge with substantial growth.
Position yourself at a slight angle to the stem, aiming for that ideal 30-degree cutting angle that preserves the essential cambium layer beneath the bark.
The secret to hedge survival lies in that perfect 30-degree cut—respecting the cambium keeps your living fence thriving for generations.
- Feel the satisfying slice as your freshly sharpened blade glides through stubborn wood
- Experience the perfect balance of control and power when your body alignment flows naturally into the cut
- Master the rhythm of the sweeping stroke that transforms struggle into effortless precision
- Connect with centuries of traditional craftsmanship through your hands with each perfect cut
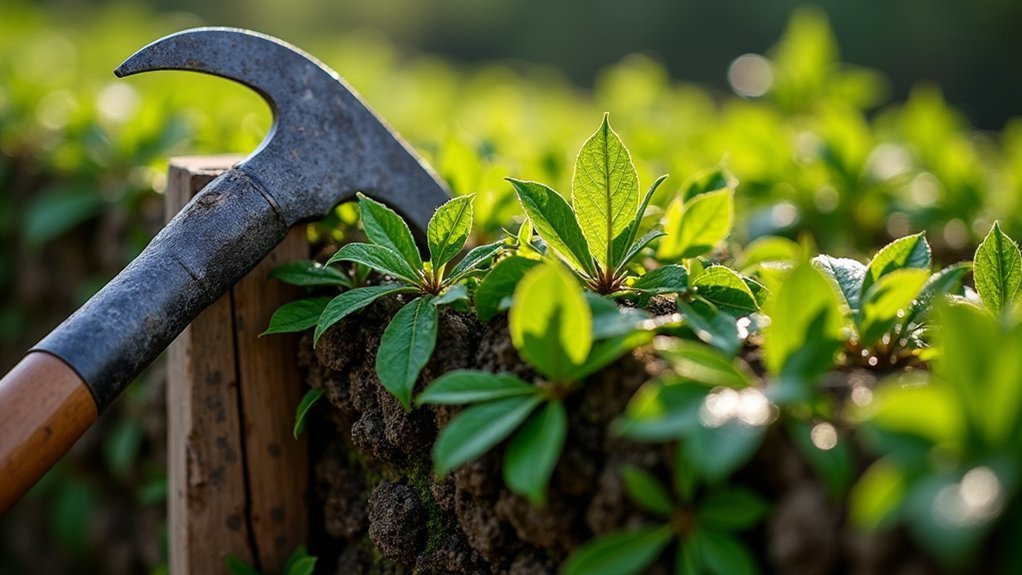
Preserving the Vital Bark Strip: The Living Hinge Method
When cutting with your billhook, position the blade about halfway through the stem at a 30-degree angle to maintain an essential connecting strip of bark.
You’ll need to preserve a bark strip that’s thick enough to support sap flow but thin enough to bend without breaking, typically 1/4 to 1/3 of the stem’s diameter.
Control the pleacher angle by adjusting your cutting position, ensuring the laid stem rests at a horizontal angle that promotes strong regrowth while maintaining the hedge’s structural integrity.
Proper Cut Positioning
The essence of successful hedge laying lies in mastering the living hinge technique. Position your billhook at a precise 30-degree angle above ground level to maintain the essential bark strip that guarantees sap flow. Your Yorkshire billhook should slice through the stem with controlled pressure, preserving the living lip that’s important for regeneration across all hedgelaying styles.
- Feel the satisfaction when your perfectly angled cut leaves that thin, life-sustaining bark strip intact.
- Experience the pride of watching your hedge thrive season after season through your skillful technique.
- Marvel at how proper cut positioning transforms ordinary boundaries into living, breathing ecosystems.
- Sense the connection to centuries of traditional craft as you perfect each precise movement.
Always assess your cuts regularly—your hedge’s future health depends on these significant positioning decisions.
Bark Strip Thickness
Now that you’ve perfected your cutting angle, let’s examine what makes a successful living hinge work: the thickness of your bark strip. When using traditional hand tools like billhooks, maintain a bark strip thickness of 1-2 inches to preserve the essential cambium layer that enables sap flow and future growth.
Cut carefully at a 30-degree angle, ensuring the strip remains intact to support your pleached stems. Avoid cutting too deeply—this damages the cambium layer beneath the bark and hinders regeneration. A consistent thickness creates strong connections between laid stems and the upright hedge structure.
During the laying process, regularly check your bark strips for signs of strain. If you notice splitting or excessive bending, you’ve likely made the strip too thin, compromising your hedge’s integrity and future health.
Pleacher Angle Control
Mastering pleacher angle control represents the cornerstone of successful hedge laying. When cutting through stems at a 30-degree angle, you’ll need to maintain a crucial strip of bark and cambium to preserve sap flow.
Position your pleachers upwards to encourage new growth and proper nutrient distribution. Your Yorkshire billhook offers precision for these critical cuts, while stakes placed every 50cm will secure pleachers at the ideal angle.
For best results, tuck pleachers into the hedge and bind them with flexible hazel rods to create tension that stimulates regeneration.
- The satisfaction of watching your perfectly angled pleachers form a living fence that will thrive for generations
- The pride of mastering a traditional craft that connects you to centuries of rural heritage
- The thrill of seeing new growth emerge from your carefully positioned stems
- The harmony of creating a habitat that supports local wildlife while defining the landscape
Regional Billhook Grips: Yorkshire vs. Midland Approaches
When approaching hedgelaying across different regions of Britain, you’ll immediately notice distinct variations in how practitioners grip their billhooks. The Yorkshire billhook, with its straighter blade profile and balanced weight and length, demands a two-handed grip for maximum leverage when tackling thicker stems.
| Feature | Yorkshire Approach | Midland Approach |
|---|---|---|
| Grip Style | Two-handed, traditional | One-handed, fluid motion |
| Blade Shape | Straight or slightly curved | Pronounced curve |
| Cutting Motion | Powerful, leveraged cuts | Swift, precise slices |
You’ll need proper foot placement regardless of which technique you adopt. Position your body strategically to maintain balance while working. The Yorkshire technique excels in dense hedgerows, while the Midland approach offers greater maneuverability for lighter, more precise cuts with its distinctive curved blade.
Precision Notching for Enhanced Regrowth
The art of precision notching stands as the cornerstone of successful hedge laying, requiring both technical skill and botanical understanding. When you cut through stems at a 30-degree angle using your Yorkshire billhook, you’ll create the perfect conditions for new growth while maintaining the hedge’s structural integrity.
Perform this technique at the stem base during the dormant season (October to March) to minimize stress and avoid disrupting nesting birds.
- Feel the satisfying snap as your billhook makes the perfect cut, knowing you’ve preserved that essential strip of cambium
- Experience the pride of watching dormant buds burst into vigorous new growth from your precisely notched stems
- Marvel at how your hedge gradually transforms into an impenetrable living barrier
- Connect with centuries of traditional craftsmanship as you master this timeless technique
The Art of the Clean Follow-Through Stroke
Skilled hedge layers execute the clean follow-through stroke with practiced precision, distinguishing novices from masters in the ancient craft.
When using a billhook, position it at a 30-degree angle to the stem and apply downward pressure in one smooth, continuous motion. This technique guarantees you’ll cut cleanly through without tearing the valuable cambium layer.
Your grip matters—hold the handle firmly while using your body weight to drive the cut, reducing wrist strain while maintaining control. The ideal slice penetrates sufficiently without damaging the living tissue beneath, essential for the pleacher’s future health.
Proper technique balances force with finesse, protecting vital plant tissue while preserving the hedge layer’s body through years of craftsmanship.
Practice on various stem sizes to build your confidence. As you master the clean follow-through stroke, you’ll notice immediate improvements in both the efficiency of your work and the robustness of your hedge.
Adapting Your Technique for Different Hedge Species

Although mastering the basic billhook stroke is essential, successfully working with varied hedge species demands specific adjustments to your technique.
When hedge laying, you’ll need to modify your approach based on the wood’s density and flexibility. Hawthorn requires a precise 30-degree cutting angle to promote sap flow, while blackthorn’s density calls for the straight-bladed Yorkshire billhook for better leverage.
- Feel the satisfying resistance of each species under your blade as you develop an intuitive connection with traditional craftsmanship
- Experience the rewarding moment when perfectly angled cuts on hawthorn lead to vigorous new growth
- Discover the quiet confidence that comes from selecting the ideal binding material for each hedge type
- Master the artisan’s touch as you adjust your pressure for delicate species like dog rose
Managing Billhook Rebound for Safety and Efficiency
When working with a billhook during hedge laying, understanding how to manage rebound is essential for both your safety and cutting efficiency.
Maintain a firm grip and position your body at an angle to the cut, keeping the blade’s trajectory away from you, especially when tackling dead wood that can cause unpredictable resistance.
Stand angled to your cut with a firm grip, directing the blade away from your body to counter unpredictable resistance from dead wood.
For ideal control, hold your billhook at approximately 30 degrees and follow through with each cutting motion. This smooth technique directs energy into the cut rather than allowing dangerous rebound.
When dealing with thicker stems as you finish the hedge, switch to a two-handed grip for greater precision.
Remember to keep your billhook sharp—a dull blade requires more force and increases rebound risk, while a sharp edge cuts predictably and efficiently.
Frequently Asked Questions
What Is the Best Billhook for Hedge Laying?
You’ll find the Yorkshire Billhook most versatile for hedge laying. It’s straight or slightly curved blade handles general cutting tasks effectively. Devon and Kentish models excel for specific regional techniques if you’re specializing.
What Is the Welsh Style of Hedge Laying?
You’ll find the Welsh style involves cutting pleachers at angles for living lips, laying them horizontally, and keeping brash for wildlife. It’s secured with hazel binders and creates denser hedges than other regional styles.
How to Lay an Old Hedge?
You’ll need to clear lower branches first, then cut stems at 30-degree angles. Lay stems along the hedge with an upward slant, install stakes every 50cm, and weave hazel binders to secure everything in place.
How to Use a Long-Handled Billhook?
Grip your long-handled billhook firmly with both hands for leverage. Position yourself to cut at a 30-degree angle, using downward strokes. You’ll reduce strain on your wrists while maintaining better posture and control during use.
In Summary
You’ve now mastered the key billhook techniques that make hedge laying both an art and practical skill. With practice, you’ll develop your own rhythm and style. Remember to maintain your tools, work with the natural growth patterns, and always prioritize safety. These traditional methods don’t just create beautiful boundaries—they’re preserving a valuable craft that benefits wildlife and landscapes for generations to come.
Leave a Reply