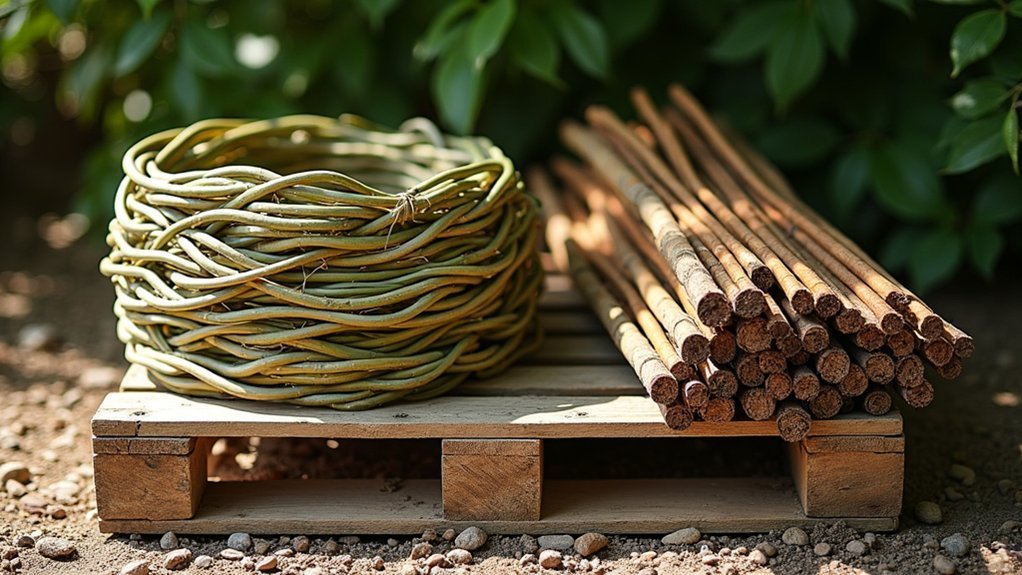
For wattle fencing, you’ll need flexible branches (willow, hazel, or dogwood) cut green at pencil thickness and 4-6 feet long. Gather rot-resistant posts like cedar or oak that extend 1/3 longer than your desired fence height. Essential tools include loppers, a sharp knife, work gloves, and natural twine or wire for binding. Don’t forget materials for daub (clay, sand, straw, and manure) if you’re weatherproofing. Below, discover exactly how these materials work together for a lasting structure.
Essential Flexible Branches for Wattle Weaving
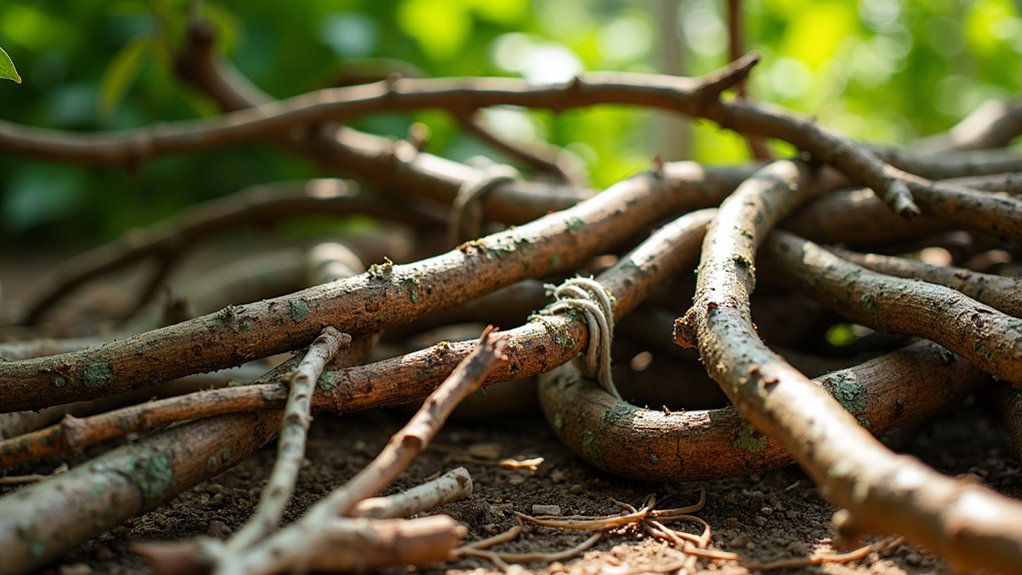
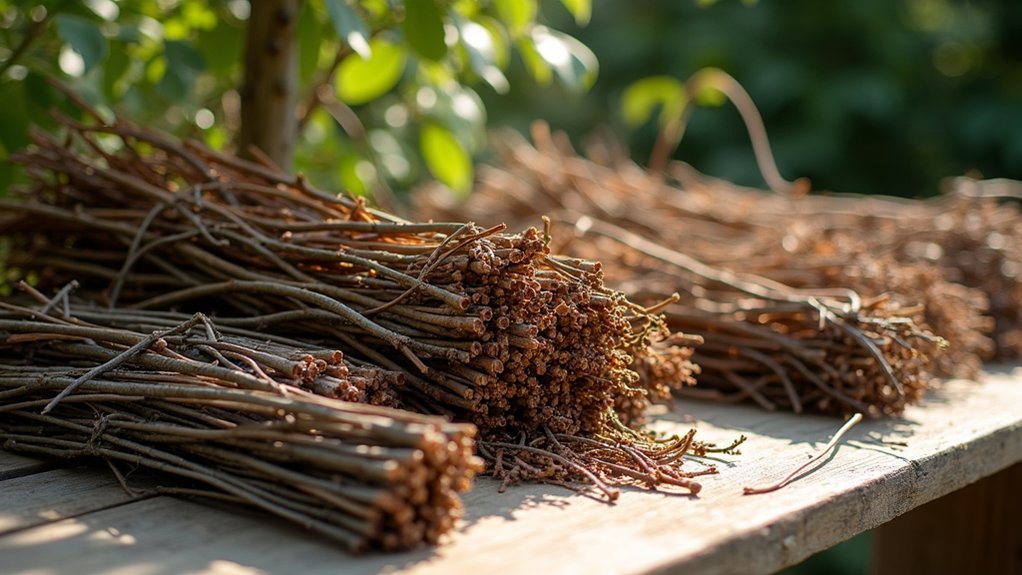
The backbone of any successful wattle fence lies in selecting the right branches. You’ll need stems that are 4-6 feet long minimum to effectively weave between your stakes. Look for pencil-thick branches (¼-½ inch diameter) that provide the perfect balance of pliability without breaking.
Always choose green, freshly cut branches as they’re markedly easier to bend than dried materials. Relatively straight branches will help maintain uniform tension throughout your weave. For best results, select naturally flexible species like willow, hazel, or dogwood that bend gracefully without snapping. One-year-old maple sprouts can also provide good weaving material when harvested at the right time.
Before weaving, test your branches by bending them 90 degrees. If they crack, they’re too brittle for your fence.
For dried branches, restore flexibility by soaking them overnight before use.
Selecting the Right Support Posts
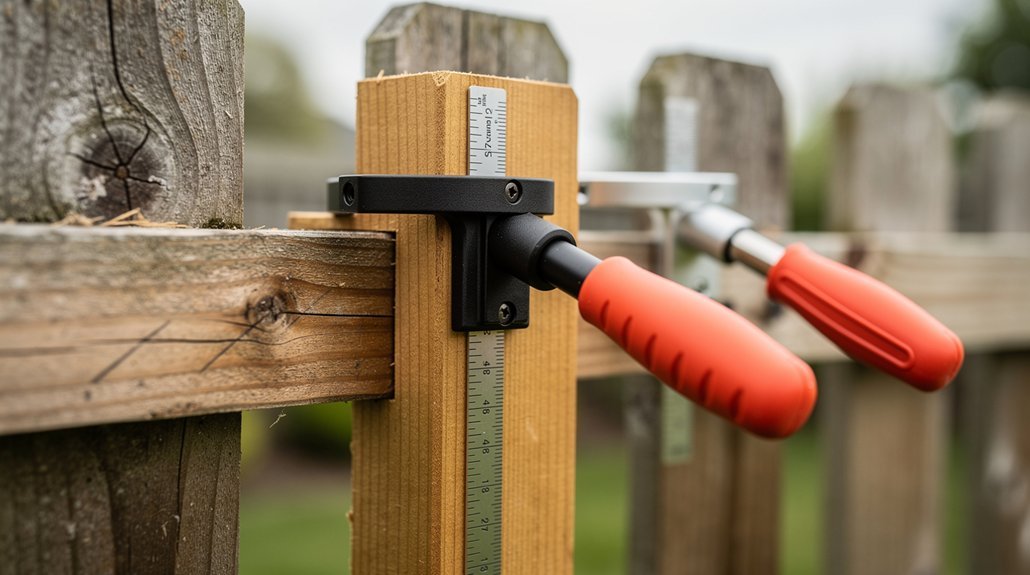
While woven branches create the fence’s pattern, sturdy support posts provide its essential foundation. Choose rot-resistant wood like cedar, oak, or black locust, or opt for pressure-treated lumber that withstands soil contact. Your posts should extend 1/3 to 1/2 longer than your desired fence height for proper anchoring. Stakes should be approximately 3′-4′ long with a diameter of 1.5″ or larger to ensure adequate support for the wattle weaving.
| Wood Type | Characteristics | Best Uses |
|---|---|---|
| Cedar | Naturally rot-resistant, aromatic | Decorative gardens, visible areas |
| Oak | Extremely durable, heavy | Long-term installations, sturdy barriers |
| Pressure-treated | Chemical protection, affordable | Utilitarian fences, wet locations |
Space posts 16-18 inches apart to facilitate proper weaving and guarantee they’re driven deep enough to withstand lateral pressure from branches and wind. Sharpen the bottoms for easier installation and compact soil around them for stability.
Necessary Tools for Harvesting and Construction
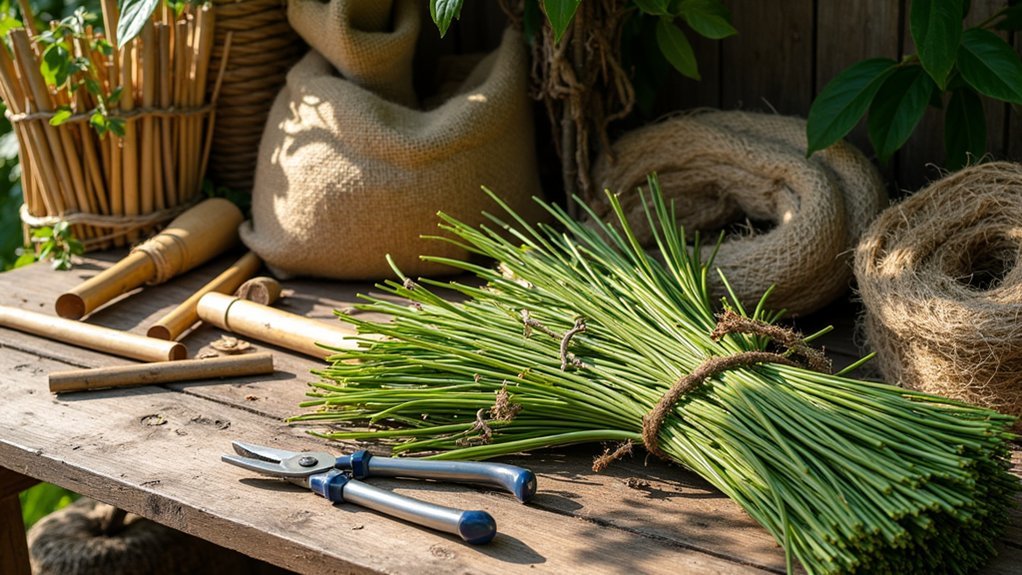
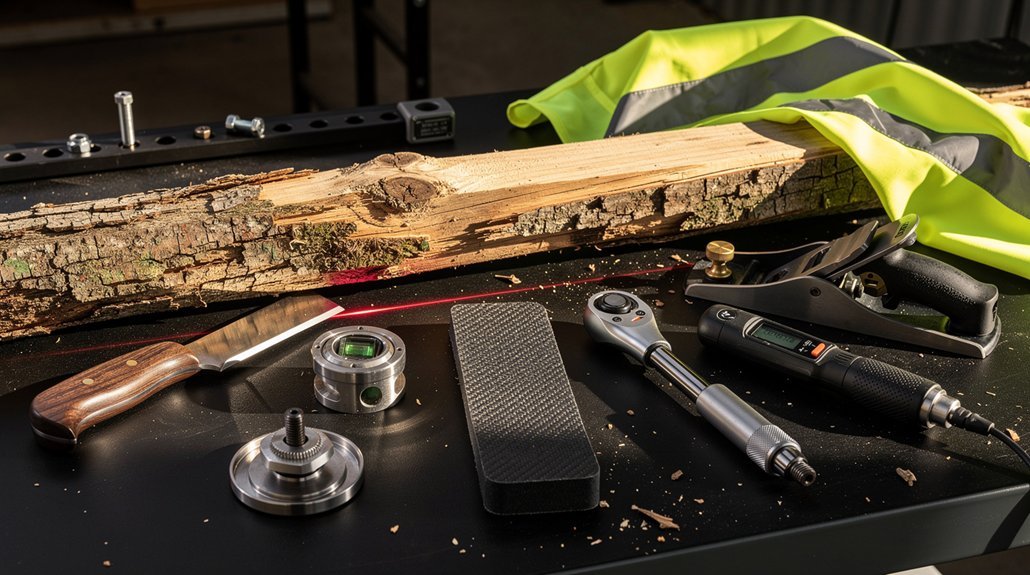
You’ll need specific cutting tools like silky saws, loppers, and bill hooks to efficiently harvest your wattle fencing materials.
For assembly, woodland mallets and work gloves prove essential when securing stakes firmly into the ground. A sharp knife is also valuable for tapering the ends of upright poles to facilitate easier insertion into the soil.
A well-constructed hurdle jig with evenly spaced holes will dramatically improve your weaving process by holding stakes upright while you weave the flexible branches.
Essential Cutting Equipment
Creating beautiful wattle fencing begins with proper cutting equipment, which guarantees both safety and efficiency throughout your project.
You’ll need an axe or billhook for cutting thicker branches and a pruning saw for smaller ones. Loppers and handheld pruning shears are essential for precise cuts on twigs and finer branches.
For heavier work, consider investing in a chainsaw or power saw. These tools drastically reduce the time needed to process larger branches and logs. When selecting clippers, many gardeners prefer Falco brand options sized appropriately for your hands.
A hand brace with auger bit or drill helps create holes for assembly, while a mallet allows you to tap stakes into place without damage.
Don’t forget your safety gear—glasses, gloves, ear protection, and steel-toed boots are non-negotiable when working with cutting tools.
Assembly Fastening Tools
Proper assembly of wattle fencing requires several specialized fastening tools that guarantee durability and structural integrity. You’ll need L-shaped galvanized steel fittings that resist corrosion and provide strong anchor points for your fence sections. Using a proper ground drill helps create accurate holes for stake placement at the recommended 45 cm spacing.
| Tool | Purpose |
|---|---|
| Manual Ringfast Tool | Efficiently attaches fencing to line wires |
| Wooden/Metal Mallets | Drives stakes securely into ground |
| Drill/Auger | Creates precise holes for stake placement |
| Natural Twine | Secures branches with figure-eight wraps |
Don’t forget to include appropriate screws and nails that come with some fittings. For additional reinforcement, consider using galvanized wire to secure sections where needed. When working with thicker branches for the top rail, you’ll find that proper fastening tools make the difference between a wobbly fence and one that stands firm for years.
Weaving Support Jigs
While fastening tools secure the wattle structure, support jigs make the weaving process itself more manageable and precise.
Frame structures hold your branches steady during weaving, eliminating frustration when working alone.
Open-work tables provide a convenient surface for laying out materials before you begin weaving them into your fence.
Stake guides are invaluable for maintaining perfect alignment of your uprights, ensuring your fence remains straight and professional-looking.
You’ll find pegs or clamps essential for holding weavings in place while you work on other sections.
Don’t overlook the value of measuring marks on your jig surfaces—they’ll help you maintain uniform spacing between uprights, creating a fence that’s both functional and aesthetically pleasing.
Historically, these techniques allowed farmers to create movable hurdles for managing livestock on small Victorian farms.
These support tools transform what could be a challenging task into a methodical, enjoyable crafting experience.
Binding Materials to Secure Your Fence
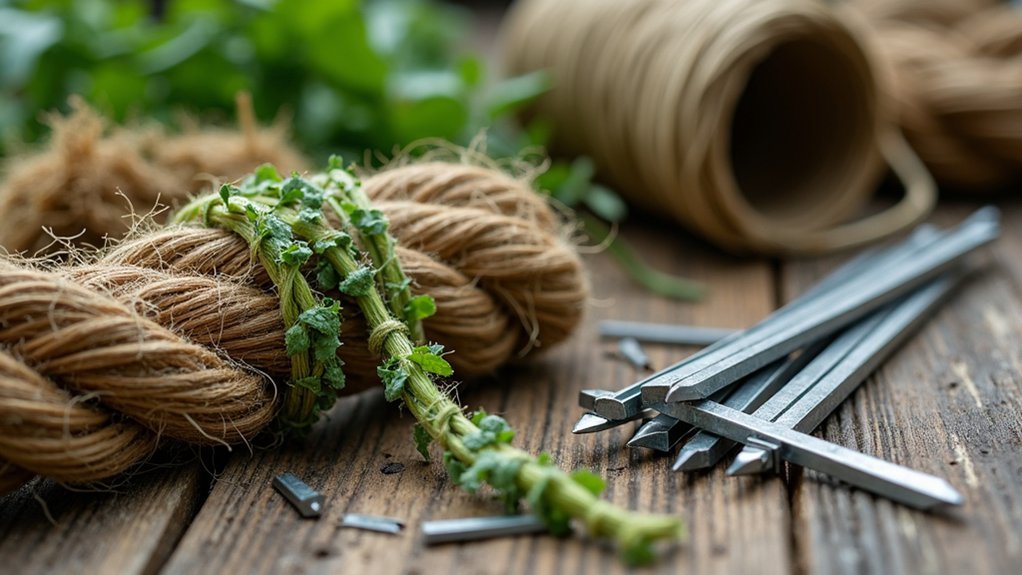
Once you’ve gathered your posts and withies, securing them properly becomes essential for a sturdy wattle fence.
You’ll need reliable binding materials to hold your creation together through the seasons.
Natural twines made from plant fibers like daylily leaves offer an authentic, biodegradable option. For stronger support, consider fiber ropes from various plants that provide excellent tensile strength.
In areas requiring extra reinforcement, thin metal wire works effectively at stress points.
Don’t overlook nature’s free offerings—cattails and long grasses can serve as practical binding elements when properly prepared.
Cedar bark stands out as a particularly valuable option, offering natural pest resistance while securing your wattle work.
Choose binding materials that complement your local environment and match your fence’s intended longevity and aesthetic appeal.
Following good foraging practices, remember to harvest no more than 1/4 to 1/3 of available branches to maintain environmental sustainability.
Soil and Daub Components for Weatherproofing
You’ll need a properly balanced clay-straw mixture at a 1:1 ratio to create daub that resists cracking while providing effective weatherproofing for your wattle fence.
Apply the daub in 2-4″ layers between wattle weavings, pressing firmly to guarantee complete integration with the wooden structure.
Allow each layer to dry for at least 48 hours before adding subsequent coats, with complete curing taking up to two weeks depending on humidity and temperature.
The use of strong yet flexible woods like hazel will ensure the wattle structure maintains its integrity when the daub is applied.
Clay-Straw Mixture Basics
The ancient practice of combining clay, sand, straw, and organic matter creates a weatherproof daub that’s stood the test of time, with some structures in the UK surviving more than 500 years.
For your wattle fence, you’ll need a standard mixture of 4 parts clay subsoil, 1 part sand, 1 part chopped straw, and 1 part manure. The clay provides adhesion, sand prevents cracking, straw acts as a fibrous binder, and manure improves workability.
Hand-chop your straw to 2-4 inch lengths for ideal interlocking. Ensure you keep the straw covered to prevent it from drying out before mixing with clay slip.
Mix dry ingredients first, then gradually add water until the daub holds its shape without cracking. Allow 1-3 days for drying, depending on thickness.
You can test your local soil composition to adjust proportions accordingly.
Daub Application Techniques
Now that you’ve prepared your clay-straw mixture, proper application will determine your wattle fence’s durability against the elements.
Apply the daub in thick layers (2-3 inches) using your hands or broad tools, pressing firmly into the wattle framework to create a seamless barrier. Guarantee complete coverage of all gaps to maximize weatherproofing. Adding small amounts of local gravel can significantly increase the structural strength of your daub mixture.
- Work in multiple layers when necessary, allowing partial drying between applications
- Focus on creating smooth outer edges that naturally shed rainwater
- Protect freshly applied daub from direct sunlight and heavy rain
- Press the mixture firmly into the woven wattle structure for ideal adhesion
For best results, apply during moderate weather conditions and allow for slow, even drying to prevent cracking and guarantee long-lasting protection for your wattle fence.
Drying Time Considerations
While applying your daub correctly creates the foundation for a durable wattle fence, understanding the critical drying process determines its ultimate weatherproofing success.
Choose clay-rich soil free of organic debris for your daub, as it provides superior cohesion and durability. Control moisture content carefully—too wet weakens the bond, too dry reduces workability.
Timing is essential; begin projects in early spring or late summer to avoid rain and frost damage. For best results, weave branches using dormant prunings gathered during early winter months when they’re most pliable.
Your daub will dry faster in warm, dry weather with gentle wind exposure, typically taking several days to weeks to become fully weatherproof. Increase straw content to prevent cracking during drying, but recognize this may extend overall drying time.
Create a slight slope around your fence base to divert water runoff and maintain consistent structural support throughout the drying phase.
Optimal Branch Harvesting Timing and Techniques
Successful wattle fencing begins with properly harvested materials, which dramatically affect your fence’s durability and appearance. Time your harvests during late winter to early spring when dormant sap increases flexibility. For sustainable practices, implement coppicing with 7-10 year cycles for hazel, making clean cuts 2-3 inches above ground to encourage regrowth. You’ll need approximately 90 to 100 branches for every six feet of fence length to ensure a tight, secure weave.
Quality wattle fencing starts with precise harvesting—cut dormant branches in late winter when their flexibility is at its peak.
- Choose hazel (Corylus avellana as your primary material for ideal flexibility and strength
- Cut branches during dormancy (late winter/early spring) for maximum pliability
- Avoid mid-summer harvesting when branches become brittle and prone to breaking
- Store freshly cut materials upright in a shaded, ventilated area to maintain moisture
If your branches lose flexibility before weaving, soak them in water for 24-48 hours to restore pliability.
Required Branch Dimensions and Quantities
Building a sturdy wattle fence requires three essential branch dimensions and quantities for ideal results.
You’ll need upright pickets measuring 1-4 inches in diameter, with lengths extending at least 8 inches beyond your desired fence height for proper ground embedding. Posts should be set 18-24 inches deep into the ground for optimal stability. Space these pickets 12-30 inches apart, using 3-5 per section depending on your fence’s required strength.
For weaving, select flexible branches under 1 inch in diameter, typically willow or hazel, in lengths of 6-8 feet to guarantee adequate weaving material. The longer and more pliable, the easier they’ll be to work with.
Finally, include thicker support stakes for corners and structural stability.
Calculate your total materials by determining the fence’s linear footage and height, then add extra to account for inevitable waste and breakage.
Alternative Wood Types for Different Environments
When building wattle fencing in distinctive environments, you’ll need materials suited to your specific climate.
Desert areas call for moisture-resistant woods like Black Locust or Juniper, while coastal locations benefit from salt-tolerant options such as Cedar or Teak.
For mountain installations, consider cold-hardy species like Willow or Hazel that can withstand temperature fluctuations and heavy snow loads. In locations like Maine with harsh winters, you must account for frost heaves that could potentially destabilize your fence structure over time.
Desert-Adapted Wood Options
While traditional wattle fencing thrives in temperate climates, desert environments offer unique native materials that excel in arid conditions.
You’ll find that desert-adapted woods often have natural durability against heat and drought, making them excellent choices for long-lasting wattle structures.
- Desert trees like mesquite and desert ironwood provide sturdy, rot-resistant posts, though they’re typically stiffer and require more effort to bend.
- Flexible options such as desert grapevines can serve as weavers due to their natural pliability.
- Cacti alternatives including dried prickly pear or cholla segments work as unique fencing components.
- Palm fronds and yucca stems offer renewable weaving material that’s well-adapted to withstand intense sun exposure.
Consider using locally abundant materials to reduce environmental impact while ensuring your fence withstands harsh desert conditions. Unlike conventional fencing that deteriorates over time, desert-adapted living fences can last for generations when properly established and maintained.
Coastal Woods Guide
Coastal environments present unique challenges for wattle fencing, requiring materials that can withstand salt spray, strong winds, and shifting soils. Choose rot-resistant hardwoods like cedar, black locust, or oak for structural posts. For flexible weaving elements, alder, willow, or fruit tree prunings work well.
| Material | Coastal Application |
|---|---|
| Cedar posts | Primary structural support, excellent salt tolerance |
| Black locust | Alternative post material, highly decay-resistant |
| Willow withies | Flexible weaving material that withstands wind |
| Local clay+straw | Reinforces gaps against moisture if using daub |
| Beach plum | Salt-tolerant native for living fence integration |
Embed your fence 1 foot deeper than usual and offset height higher to compensate for sandy soil conditions. Harvest materials in late winter when sap is low, and angle wattles slightly inland to better deflect coastal winds.
Mountain Species Selections
Mountain environments demand specific wood selections for wattle fencing that can endure harsh conditions at higher elevations.
Traditional options like willow, alder, and hazelnut offer excellent flexibility for weaving, while mountain ash and rowan provide the durability needed to withstand extreme weather.
When selecting materials for your mountain wattle fence, consider:
- Flexibility vs. Durability – Choose willow for intricate weaving or pine for structural strength
- Local Availability – Utilize abundant species like birch, aspen, or cottonwood to reduce environmental impact
- Climate Adaptation – Select moisture-resistant woods like cedar for humid areas
- Maintenance Requirements – Opt for naturally rot-resistant species that won’t require frequent replacement
Always harvest green wood for maximum pliability during construction, ensuring tight weaves for greater fence stability.
Budget Planning for Your Wattle Fence Project
Before launching your wattle fence project, you’ll need a thorough budget that accounts for all potential expenses. Calculate material costs by measuring your fence perimeter and estimating the amount of saplings and posts required. Consider whether you’ll scavenge materials or purchase them, then factor in additional supplies like nails and tools.
| Budget Component | DIY Approach | Professional Installation |
|---|---|---|
| Materials Only | $50-150 | $200-400 |
| Time Investment | 8-16 hours | 2-4 hours |
| Longevity Value | 3-5 years | 5-7 years |
Allow for a 10-20% contingency in your budget for unexpected costs. Remember that while initial investment may seem significant, wattle fencing typically costs less than commercial alternatives over time, especially if you’re harvesting materials yourself.
Preserving and Extending the Life of Your Materials

Longevity of your wattle fence begins with proper material preparation and maintenance. Apply natural preservatives to exposed wood and keep the fence base clear of mulch and soil to prevent premature rot. Implement a regular inspection schedule to catch potential issues before they worsen.
- Treat stake ends and posts with natural oils to increase resistance to decay and pest damage.
- Clean debris regularly from the fence structure to prevent moisture accumulation.
- Repair gaps and damage promptly to maintain structural integrity.
- Replace sections of weaving every 3-4 years while testing overall stability.
Seasonal maintenance is essential – brush the fence to remove fungal growth and apply natural coatings to repairs so they blend seamlessly with existing materials.
Frequently Asked Questions
Can I Use Bamboo Instead of Traditional Branches?
Yes, you can use bamboo as an alternative to traditional branches. It’s cost-effective, eco-friendly, and strong. Split it in half to increase flexibility for weaving. Bamboo works similarly to traditional materials for wattle fencing.
How Do I Protect Wattle Fencing From Termites?
To protect your wattle fencing from termites, use naturally resistant woods like willow or hazel, apply oil-based stains, create gravel barriers around posts, manage moisture, and conduct regular inspections for early detection of infestations.
Is Wattle Fencing Suitable for Snow-Heavy Regions?
Yes, wattle fencing can work in snow-heavy regions if you use hardwood stakes (oak/sycamore), reinforce supports, guarantee proper drainage, and apply daub for insulation. You’ll need more maintenance and should check annually for rot.
Can I Create Curved or Circular Wattle Fencing Designs?
Yes, you can create curved or circular wattle fencing! Use flexible green wood like willow or bamboo, space your stakes 16-18 inches apart, and weave your rods following your desired curve shape for beautiful, flowing designs.
How Does Wattle Fencing Impact Local Wildlife Habitats?
Your wattle fencing impacts wildlife less severely than traditional fencing. It’s permeable, reducing habitat fragmentation, and uses natural materials. You’ll still need to contemplate migration paths and provide gaps for animal movement.
In Summary
You’ll need various materials for your wattle fence: flexible branches like willow or hazel, sturdy posts, cutting tools, binding materials, and possibly soil-daub mixtures for weatherproofing. Remember to select properly sized branches and consider your environment when choosing wood types. With proper planning and preservation techniques, you’ll create a durable, attractive fence that doesn’t break your budget while adding rustic charm to your property.
Leave a Reply