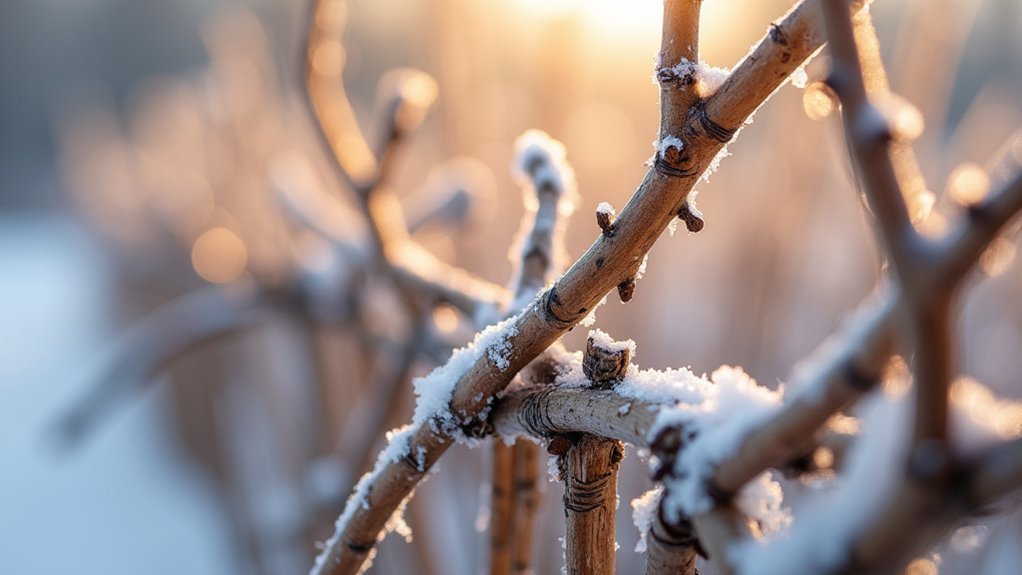
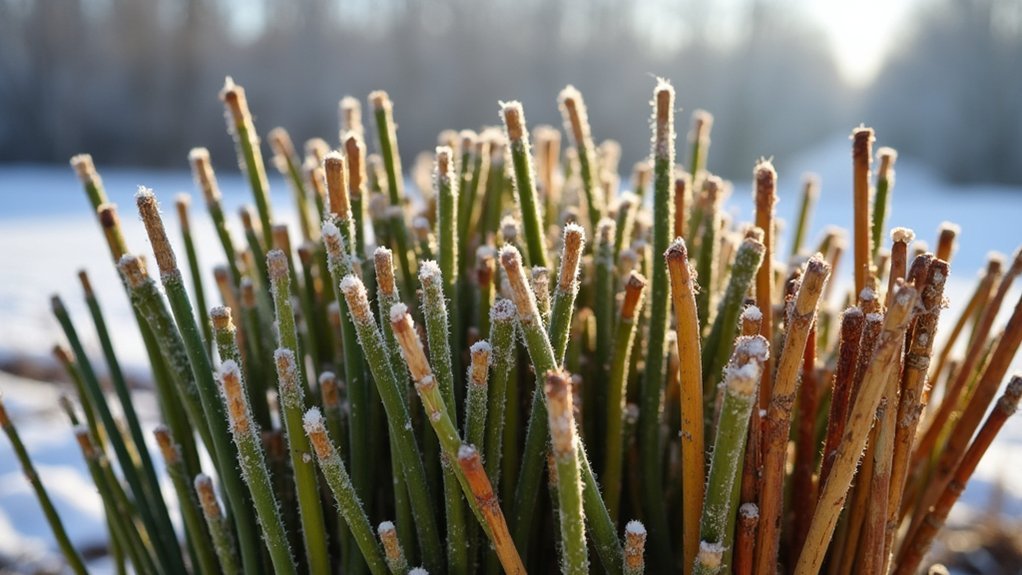
Harvest willow between November and March during dormancy, cutting at a 45-degree angle just above healthy buds. Use sharp secateurs for thin branches and loppers for thicker stems. Only remove one-third of growth to preserve plant health, and sort stems by thickness—thicker for structure, thinner for weaving. Soak harvested willow for 24 hours to enhance flexibility before use. The right harvesting technique becomes your foundation for creating durable, natural fencing that lasts years.
Winter Willow: Harvesting Tips for Natural Fencing
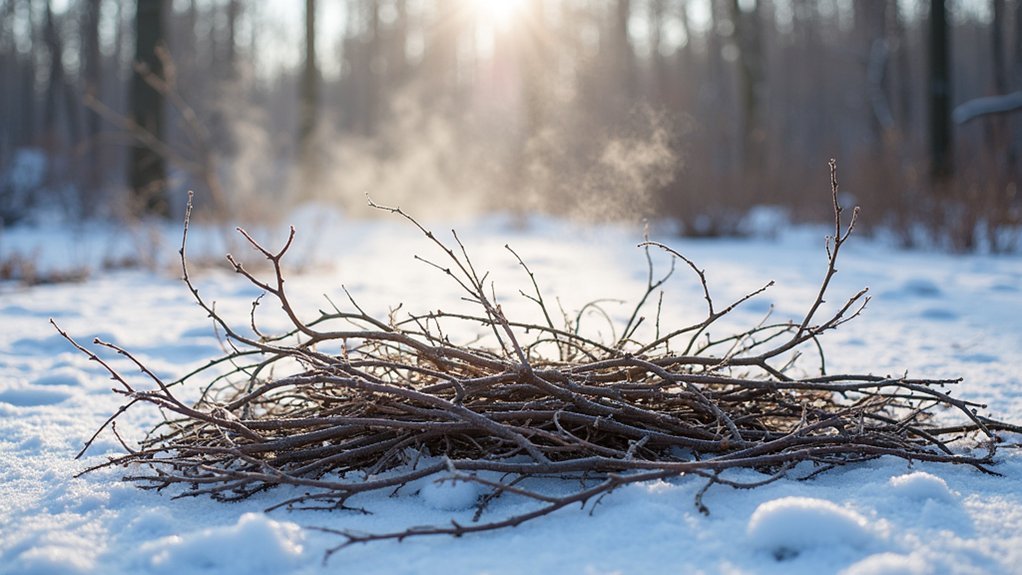
Bundled in winter gear, you’ll find yourself at the perfect moment to harvest willow for natural fencing projects. During dormancy, willow cuttings maintain their importance, ensuring successful establishment when planted later.
Grade your willow rods by size as you harvest—reserve thicker stems for structural elements in your living willow structures, while thinner ones work best for intricate weaving patterns.
Sort your willow by thickness—sturdy stems create strong foundations while slender ones enable detailed weaving work.
For pollarding techniques, select longer stems to promote robust new growth and denser fencing.
Once harvested, soak your willow in water for at least 24 hours to preserve flexibility before use. This simple step keeps them pliable for easier handling during construction.
Remember that your natural fence requires ongoing care—seasonal pruning and regular maintenance will reward you with healthy growth and a sturdy, living boundary.
The Best Timing for Winter Willow Harvesting
While many gardening activities slow during the colder months, winter presents the ideal window for harvesting willow intended for natural fencing. You’ll want to harvest willow between late November and early March when the plants are dormant.
This dormant period offers two key advantages. First, you’ll get maximum flexibility from freshly cut rods, making them considerably easier to weave into sturdy structures.
Second, cutting during winter reduces stress on the parent plant, encouraging vigorous regrowth when spring arrives.
Focus on selecting one-year-old stems that balance strength with pliability.
After you harvest willow, store your rods in a cool, moist environment to maintain their flexibility until you’re ready to begin your fencing project. This preservation step guarantees your materials remain workable.
Essential Tools for Collecting Willow Branches
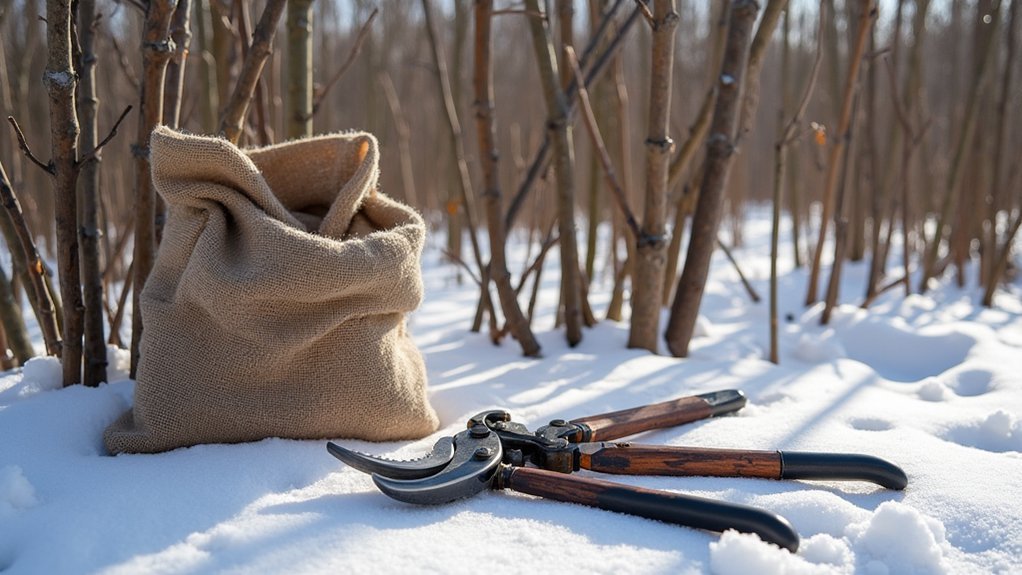
Four essential tools will transform your willow harvesting from challenging to efficient. When collecting willow branches for natural fencing, you’ll need sharp secateurs for basic cuts, sturdy loppers for thicker stems, and a saw for larger trunks. Don’t forget protective gloves to prevent splinters and cuts during the process.
| Tool | Purpose | Importance |
|---|---|---|
| Secateurs | Clean cuts on thin branches | Crucial for precision work |
| Loppers | Cutting thicker stems | Reduces strain on hands |
| Saw | Handling large trunks | Necessary for mature willows |
| Gloves | Hand protection | Prevents injuries |
A pruner’s snip guarantees clean cuts that promote healthy willow regrowth, while a sturdy basket prevents damage during transport. For immediate fence installation, include a sledgehammer to drive posts into the ground.
Identifying the Right Willow Species for Fencing
Selecting the perfect willow variety can make or break your natural fencing project. Brown willow (Salix viminalis) offers exceptional weaving flexibility, while Flanders red willow (Salix alba vitellina x fragilis) adds vibrant color to your willow fence.
The perfect willow choice transforms ordinary fencing into a masterpiece of flexibility and natural beauty.
For sturdy uprights, sweet chestnut (Castanea sativa) measuring 50-75mm in diameter provides excellent resistance to decay.
Always prioritize willow specifically cultivated for hurdle making, as these varieties deliver superior strength and pliability. If you’re working immediately, choose green willow for its natural flexibility. For stored materials, you’ll need to soak dried willow to restore workability.
When planning your fence, assess your local climate and soil conditions. Salix alba and other willow species adapt well to various environments, which helps guarantee your natural fencing thrives long-term.
Proper Cutting Techniques to Ensure Plant Health
When harvesting willow for fencing, you’ll want to make clean cuts at a 45-degree angle using sharp secateurs or loppers to promote faster healing and reduce disease risk.
The timing of your harvest matters greatly—late winter or early spring before new growth appears is ideal for maintaining the plant’s health and vigor.
Your cutting technique directly impacts the willow’s ability to regenerate, so always cut just above a healthy bud to encourage robust new shoots.
Cutting Angle Matters
The proper cutting angle serves as a critical factor in maintaining willow health when harvesting for natural fencing. When you cut your willow grown stems, always make clean 45-degree angle cuts using sharp secateurs or loppers. This angle maximizes the healing surface and prevents water pooling on the cut, reducing disease risk.
| Cut Type | Benefits | Best Practice |
|---|---|---|
| 45° Angle | Promotes healing, reduces disease | Use sharp tools for clean cuts |
| Straight (90°) | Not recommended | Avoid – causes water pooling |
| Jagged/Torn | Damages plant structure | Always use sharp tools |
Never cut too close to the main stem—leave 1-2 inches to support regrowth. Time your harvesting during the dormant season (late winter/early spring) for ideal results. Regularly inspect your cuttings to maintain only healthy specimens in your fence project.
Seasonal Health Considerations
Proper timing and technique work together to maintain willow’s long-term significance beyond just the angle of your cuts.
When establishing a living willow fence, harvesting during winter dormancy is essential—this is when the plant’s energy is stored in its roots, allowing for minimal stress during cutting.
Only remove one-third of the willow’s growth to preserve health and encourage robust spring regrowth. Harvest on dry days when sap flow is minimal to prevent excessive moisture loss that could weaken your fence material.
After harvesting, boost your cuttings’ potential by soaking them in water for 24 hours before planting.
These seasonal health considerations guarantee your willow not only survives the harvest but thrives afterward, producing the vigorous new shoots important for a sturdy, self-renewing fence structure.
Sorting and Storing Your Harvested Willow
Successfully harvesting willow is only half the battle; organizing and preserving your materials properly guarantees they’ll remain workable for your natural fencing projects. After winter harvesting, grade your stems by size, separating thicker ones for structural elements and thinner stems for weaving work.
| Storage Method | Duration | Best For |
|---|---|---|
| Water immersion | 24 hours | Maintaining flexibility |
| Burlap/mesh bags | Long-term | Preventing mold |
| Cool, dark space | Seasonal | Preserving quality |
When storing your willow, always use breathable materials like burlap or mesh that allow moisture to escape while protecting stems from direct sunlight. Create a simple labeling system marking variety and size to quickly locate exactly what you need for specific projects. Proper sorting and storing techniques guarantee your harvested willow remains in prime condition until you’re ready to create your natural fencing.
Preparing Willow Rods for Weaving Success
Before diving into the weaving process, preparing your willow rods properly guarantees maximum flexibility and longevity in your natural fence. Start by submerging your harvested rods in water for 24 hours. This essential step revitalizes their pliability, making them easier to manipulate during weaving.
Trim the bottom 10cm of each rod before working with them. This practice not only improves the chances of successful rooting but also creates a clean, uniform base for structural stability.
Always prioritize using freshly cut green willow for your weaving projects whenever possible. If you’re using stored willow that has dried, you’ll need to soak it for several hours to restore its suppleness.
Remember that thicker rods (1-2 inches) work best for structural elements, while thinner ones are ideal for intricate weaving patterns.
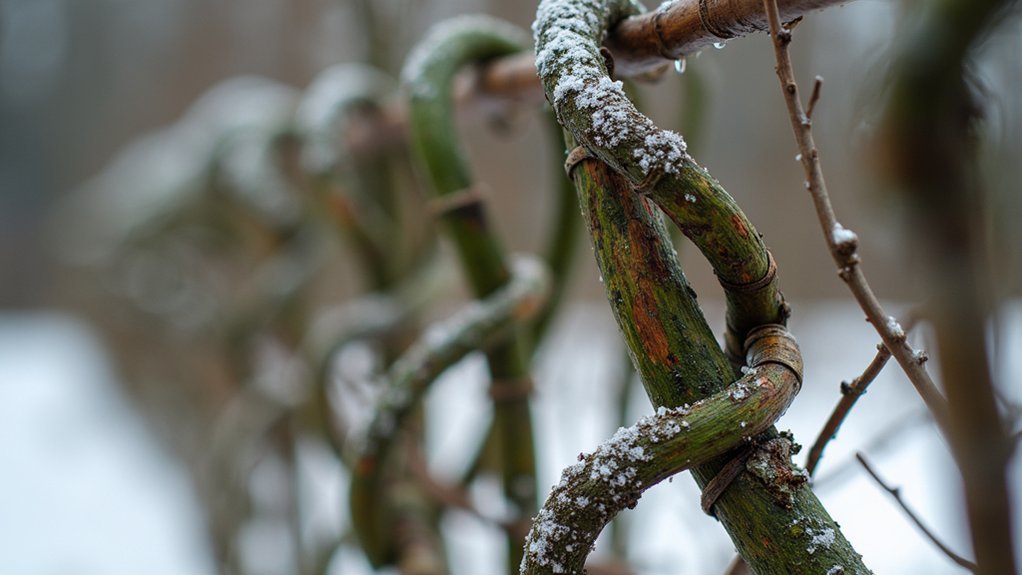
Traditional Weaving Patterns for Sturdy Fences
Mastery of weaving patterns forms the backbone of any durable willow fence. Traditional weaving patterns like diamond and lattice designs don’t just enhance visual appeal—they distribute tension evenly, creating stronger structures that withstand environmental pressures.
Weaving patterns aren’t merely decorative—they’re the structural foundation that gives willow fences their remarkable resilience.
To create a fence that will endure for years:
- Weave five rods through each upright, always starting from the same side for consistency.
- Incorporate gentle curves into your design to increase structural integrity against wind.
- Lock your weave by pulling the final rods upward from the base and twisting ends around uprights.
Don’t underestimate the importance of tight weaving—properly secured patterns prevent unraveling.
Regular maintenance of your willow fence guarantees these traditional weaving patterns maintain their integrity and aesthetic value throughout changing seasons.
Creating Curved Sections in Your Willow Fence
While straight fences provide practical boundaries, curved willow sections transform your garden with flowing, natural lines that complement organic landscapes.
Begin by marking your desired curve with pegs and string to guide your work. Set sweet chestnut uprights at 1.8m intervals along this line, burying them at least 300mm deep for stability.
When creating living curves, use freshly cut brown willow rods that offer maximum flexibility without breaking. Weave these pliable stems in alternating directions around the curve for added strength and visual interest.
The natural bend capacity of willow makes it perfect for following contours of your landscape.
Secure each rod’s end firmly around posts and lock your weave by pulling final rods upward from the base, ensuring your curved sections maintain their elegant shape over time.
Setting Posts and Establishing a Strong Foundation
You’ll need to space your sweet chestnut posts precisely 1.8 meters apart to create a properly balanced willow fence.
Drive each post at least 300mm into the ground using a sledge hammer, ensuring they’re completely stable before moving forward.
Check your posts’ firmness by applying pressure to each one, as any wobbling will compromise the integrity of your natural fence once you begin weaving.
Post Spacing Matters
The backbone of any successful willow fence lies in correctly positioned posts. When installing your living fence, proper post spacing creates both stability and aesthetic appeal. Space sweet chestnut uprights approximately 1.8 meters apart to provide the structural integrity needed for effective willow weaving.
For longevity and security, remember these essentials:
- Drive posts at least 300mm deep into the ground using a sledgehammer for maximum stability.
- Incorporate gentle curves in your fence line to enhance both visual appeal and structural strength.
- Verify consistent spacing throughout to distribute pressure evenly, extending your fence’s lifespan to 5-10 years.
With carefully spaced posts anchoring your living fence, you’ll create a foundation that withstands wind, animals, and time while supporting the natural beauty of woven willow.
Secure Deep Placement
Every successful willow fence begins with properly anchored posts that resist shifting and toppling.
You’ll need to set your sweet chestnut posts at least 300mm deep in the ground to create a stable foundation for your willow weaving.
Space these uprights approximately 1.8 meters apart, allowing ample room for effective weaving while maintaining the fence’s structural integrity. A sturdy sledge hammer is your best tool for driving posts securely into position.
During installation, regularly check each post’s vertical alignment to verify a professional finish.
Consider incorporating gentle curves into your fence design—they’re not just visually appealing but also add structural strength to your secure deep placement strategy.
These curved sections distribute pressure more evenly, helping your willow fence withstand weather and physical stress for years to come.
Maintaining Moisture Levels in Harvested Materials
Once you’ve collected your willow for natural fencing, maintaining proper moisture becomes essential for preserving its flexibility and workability. Immediately submerge your harvested willow in water for 24 hours to guarantee ideal moisture levels throughout the material.
- Store your willow in a cool, shaded location to prevent premature drying and maintain pliability for your fencing project.
- Monitor moisture content regularly and re-soak materials if they begin to feel dry or brittle.
- For extended storage, wrap your willow in damp cloths or use a misting technique to keep materials hydrated.
If your willow has already dried out, don’t worry—you can resurrect its flexibility by soaking it for several hours before weaving. This simple step will restore the suppleness needed for effective fence construction.
Extending the Lifespan of Your Willow Structure
After properly preparing your willow materials, you’ll want to focus on maximizing the durability of your living fence. Regular seasonal pruning and trimming are essential for promoting healthy growth and preventing structural collapse of your willow fence. Apply mulch around the base to retain moisture and suppress weeds.
| Maintenance Task | Benefit | Timeframe |
|---|---|---|
| Seasonal pruning | Prevents collapse | Spring/Fall |
| Soil monitoring | Guarantees proper nutrition | Monthly |
| Securing weave ends | Locks structure against wind | During installation |
Remember that your willow fence will last between five and ten years under ideal conditions. Always use freshly cut green willow for weaving as it offers greater flexibility and strength. If you’re working with dried willow, soak it beforehand to maintain resilience. These practices will help maintain your natural fence’s integrity throughout its lifespan.
Frequently Asked Questions
How to Preserve Willow Fencing?
To preserve willow fencing, soak freshly cut stems for 24 hours before weaving. Check regularly for rot, apply natural sealant, prune to encourage growth, and establish annual maintenance to replace damaged willow.
How Do You Harvest Wild Willow?
To harvest wild willow, cut 1-2 year old stems during winter dormancy using sharp secateurs. Make angled cuts on stems 5-10mm thick. Store them in water for 24 hours to maintain flexibility before use.
Can You Make a Fence From Willow?
Yes, you can make a fence from willow. Use brown willow for weaving and sweet chestnut for posts. Set posts 300mm deep, space them 1.8m apart, and weave five rods per upright for stability.
How Long Will a Willow Fence Last?
Your willow fence will typically last 5-10 years with proper care. You’ll get maximum longevity by using fresh rods, installing uprights deeply, performing regular maintenance, and protecting it from extreme environmental conditions.
Is Willow Wood Good for Fencing?
Yes, willow wood is excellent for fencing. You’ll find it’s highly flexible and durable when freshly cut, allowing you to weave it into strong, attractive barriers that can last 5-10 years with proper maintenance.
In Summary
You’ll find that harvesting willow branches in winter brings incredible rewards to your garden. With the right tools, techniques, and timing, you’ve now got everything needed to create a stunning living fence. Remember to keep your cuttings moist, establish solid foundations, and perform regular maintenance. Your natural willow fence won’t just mark boundaries—it’ll become a beautiful, sustainable feature that evolves with your landscape.

Leave a Reply